Microsoft has released the latest Windows 11 Preview, which as the name suggests, is a preview/beta version ahead of the official rollout of the new operating system — a successor to the Windows 10.
There are several features in the software and one of them is Microsoft Defender, which is a part of Microsoft Security. It is a free anti-malware software in Windows operating system that protects computer from viruses and malwares.
If you don’t have other commercial antivirus or security program installed, Microsoft Defender should be a great feature. However, if you are using a third-party software or if it’s interfering with any or your tools and you want to disable the feature, then here is a step-by-step guide for the same. The same process can also be followed to enable the security tool in Windows 11.

Enable/Disable Microsoft Defender in Windows 11
Step 1: Open the System Settings application on your computer. For this, you can press the Windows + i keys on your keyboard or click on Start and then select Settings.
Alternatively, you can use the search box on the taskbar and search for Settings and then select the app to open it.
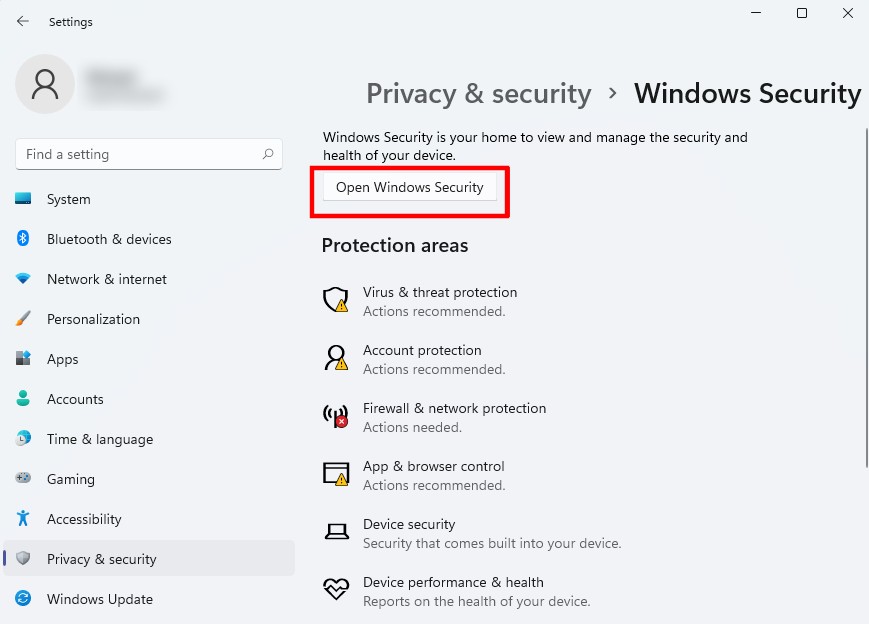
Step 2: In Windows Settings, click Privacy & Security and then select Windows Security on the right pane of the screen.

Step 3: Now, click the “Open Windows Security” button. This will bring you to Widows Security home settings pane.
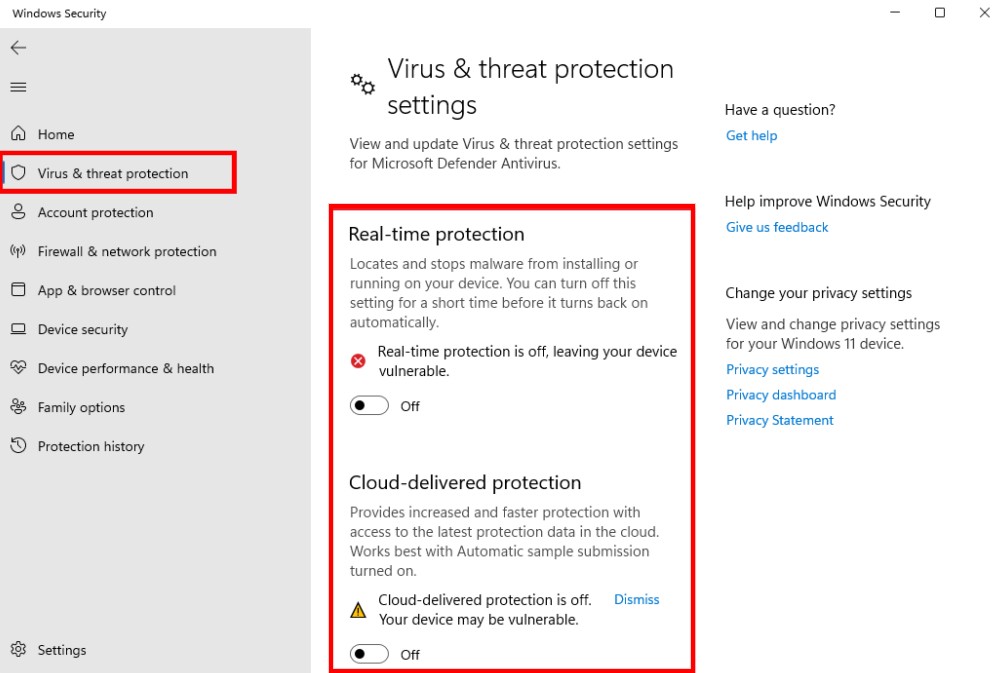
Step 4: From the left side panel, select “Virus & threat protection” on the left menu, under Virus & threat protection on the right pane, click Mange settings link.

Step 5: To turn off Real-time protection and Cloud-delivered protection, turn the toggle switch off for both the options.
You can also disable Microsoft Defender Firewall by going to “Firewall and network protection” from the left-side panel. After that, go to “App and browser control” to disable “Check files and apps” and “SmartScreen for Microsoft Edge” features to disable majority of the Microsoft Defender features. To enable these features, just toggle the switch ON and the features will be enabled.
It goes without saying that if Microsoft Defender is not impacting the performance or interfering with other security suite installed on your computer, then you should keep the service enabled for security.

