Microsoft has its own voice assistant named Cortana that the company enabled in the Windows operating system by default with Windows 10. In the newly announced Windows 11 OS, the company continues to do so.
However, Cortana isn’t up to the mark when compared to Google Assistant and Amazon Alexa. If you are annoyed by the feature or simply just don’t want to keep it enabled if you are not using it, then there’s a way to disable it.
In this step-by-step guide, we will show how you can easily disable Cortana from your Windows 11 operating system using the Setting app. There are a few other methods but for this guide, we will stick with the easiest one.

How to disable Cortana in Windows 11
Step 1: Open the Settings menu for your Windows computer by clicking the Windows + I shortcut keys on the keyboard.
Step 2: Now, to the Apps from the left menu bar and select Apps and Features from the right-hand side pane.
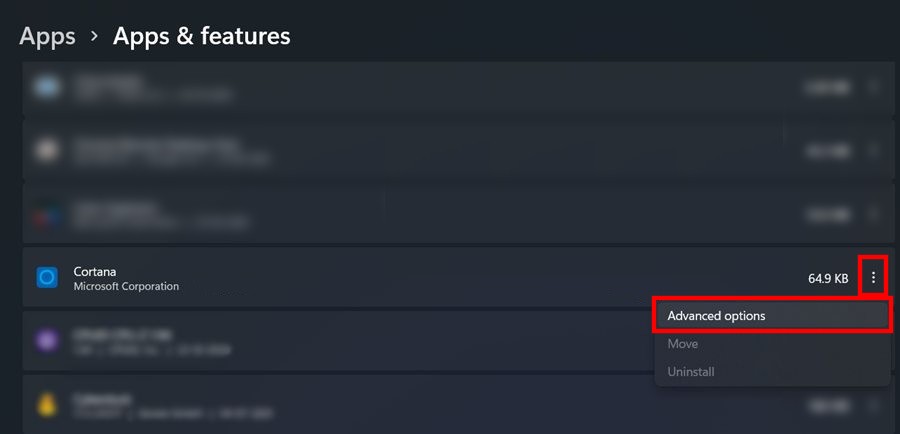
Step 3: In the page that opens, scroll down to the Cortana app and click on the overflow icon next to it and then select the “Advanced options” from the drop-down list.
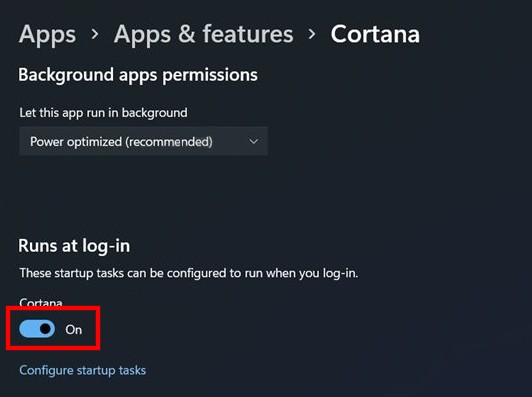
Step 4: Finally, turn off the toggle switch under the “Run at Log-in” section.


That’s it. Once you have made these changes on your computer, the system won’t run Cortana when it boots up. What this does is it disables Cortana on your computer but the feature isn’t completely disabled. To completely disable the feature, you will need to tweak the system’s registry. We will soon cover a step-by-step guide for the same.
