Windows operating system, including the newly released Windows 11 from Microsoft comes with a virtual keyboard or the touch keyboard feature that enables the users to have an on-screen keyboard if the physical keyboard isn’t working properly or if the device is being used in the tablet mode.
The touch keyboard on Windows 11 also has support for autocorrect which automatically corrects the mistyped words when you are using the virtual keyboard. However, not everyone wants this feature and some even find it annoying.
If you are among those who don’t want to use the autocorrect feature for the touch keyboard in Windows 11 operating system, then here is a step-by-step guide on how you can easily disable it through Settings.
How to disable touch keyboard autocorrect in Windows 11
Step 1: Open the Windows Settings application on your computer. For this, you can either click on the app from the Start menu or search for it. You can also press the Windows + I keys on your keyboard to open the app.
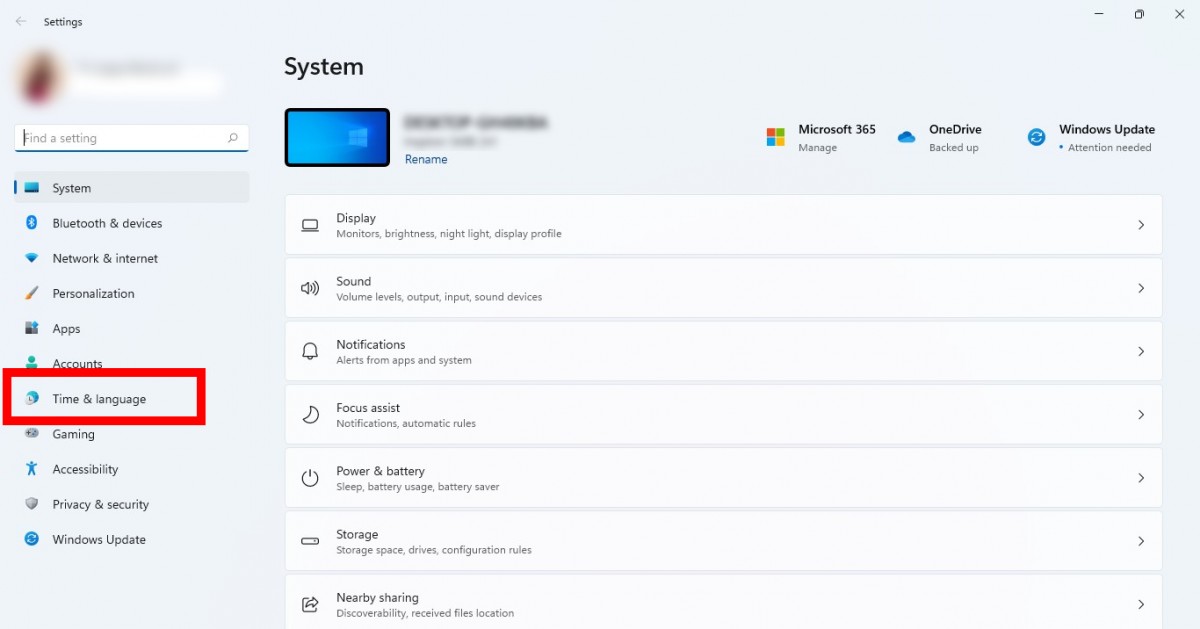
Step 2: Once the Settings app opens, click on the “Time & Language” from the left-hand sidebar.

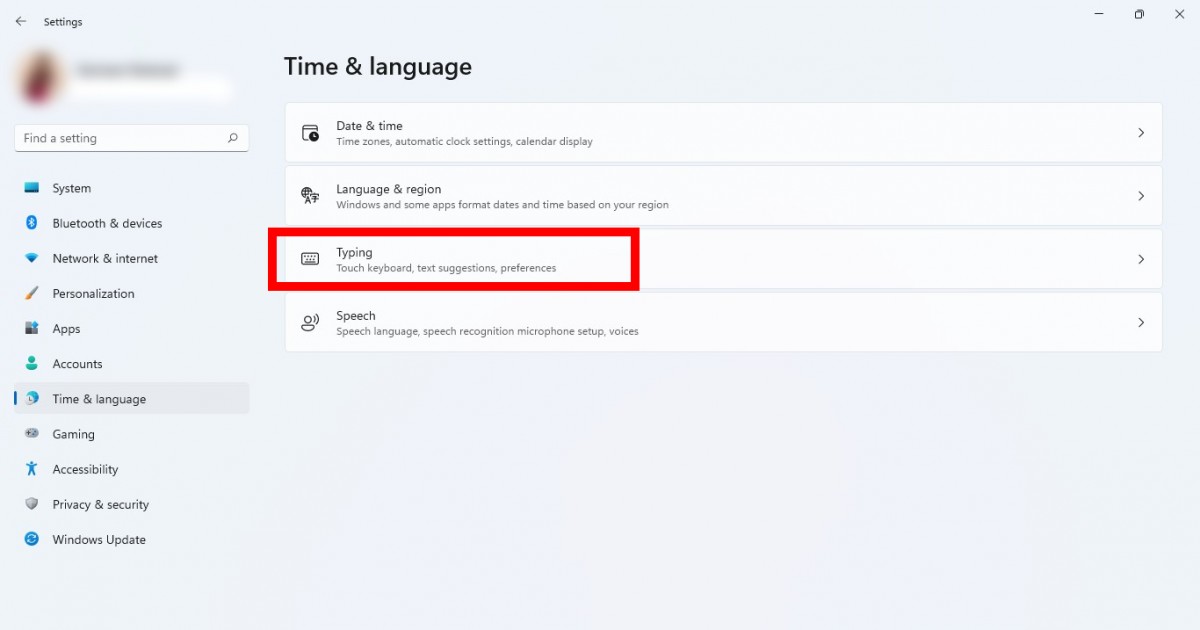
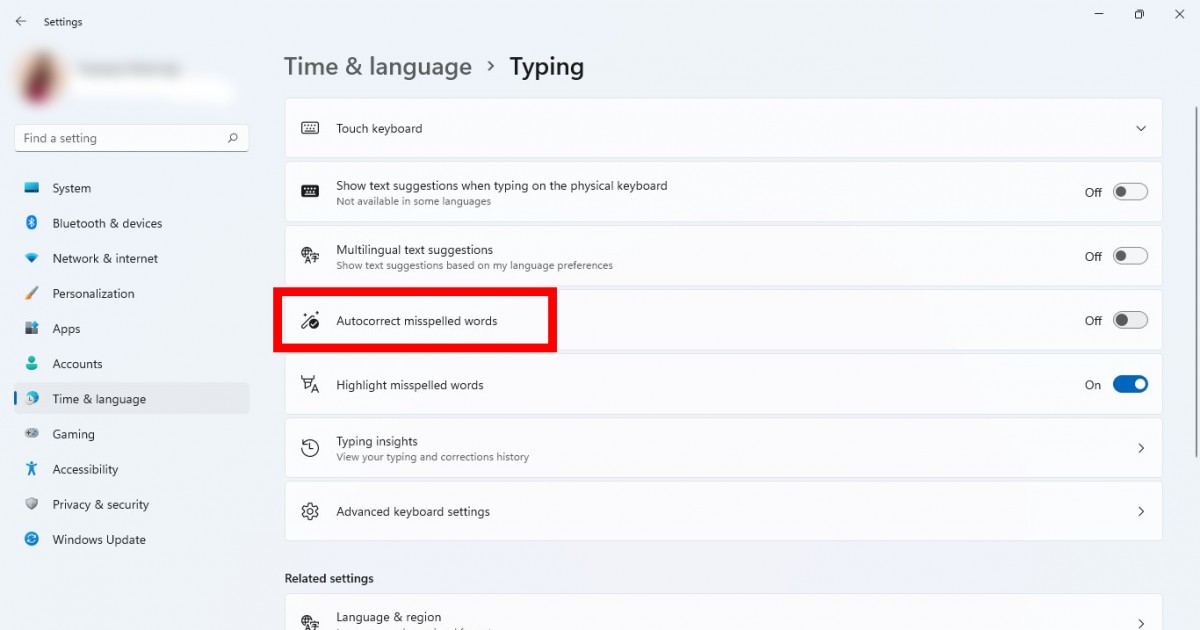
Step 3: Under the “Typing” section on the right side, select the “Autocorrect Misspelled Words” option and toggle the switch Off.


Step 4: Also disable the “Highlight Misspelled Words” if you don’t want to have the incorrect words highlighted.
That’s it. The autocorrect feature for the touch keyboard or the virtual keyboard on your Windows 11 computer has now been disabled. If you want to re-enable the feature, just follow the same steps as above but in step 3, toggle the switch ON and the feature will be enabled.
