The Windows 11 operating system from Microsoft comes with the Quick Settings feature enabled by default which can be used to access several settings on the computer, including Accessibility, Wi-Fi, Battery saver, Bluetooth, Airplane mode, and more.
The feature is quite useful as it saves time for the users for going into the Settings app and selecting the relevant option and then take action. Instead, the user can now change the settings right from the Quick Settings panel by clicking on the taskbar.
But there are many users who are not using this feature and some might even find it annoying to accidentally open it. If you are among those, then the good news is that it can be easily disabled. There are a few ways to disable the feature but we will be taking a look at the one using Registry Editor.
In this step-by-step guide, we will show you how to quickly and easily disable the Quick Settings panel on your Windows 11 computer using the built-in Registry Editor.
How to disable Quick Settings through Registry Editor in Windows 11
Step 1: Open the Registry Editor on your Windows 11 computer. To do this, press the Windows + R Keys on the keyboard and when the Run prompt appears, enter “regedit” and hit the Enter key.
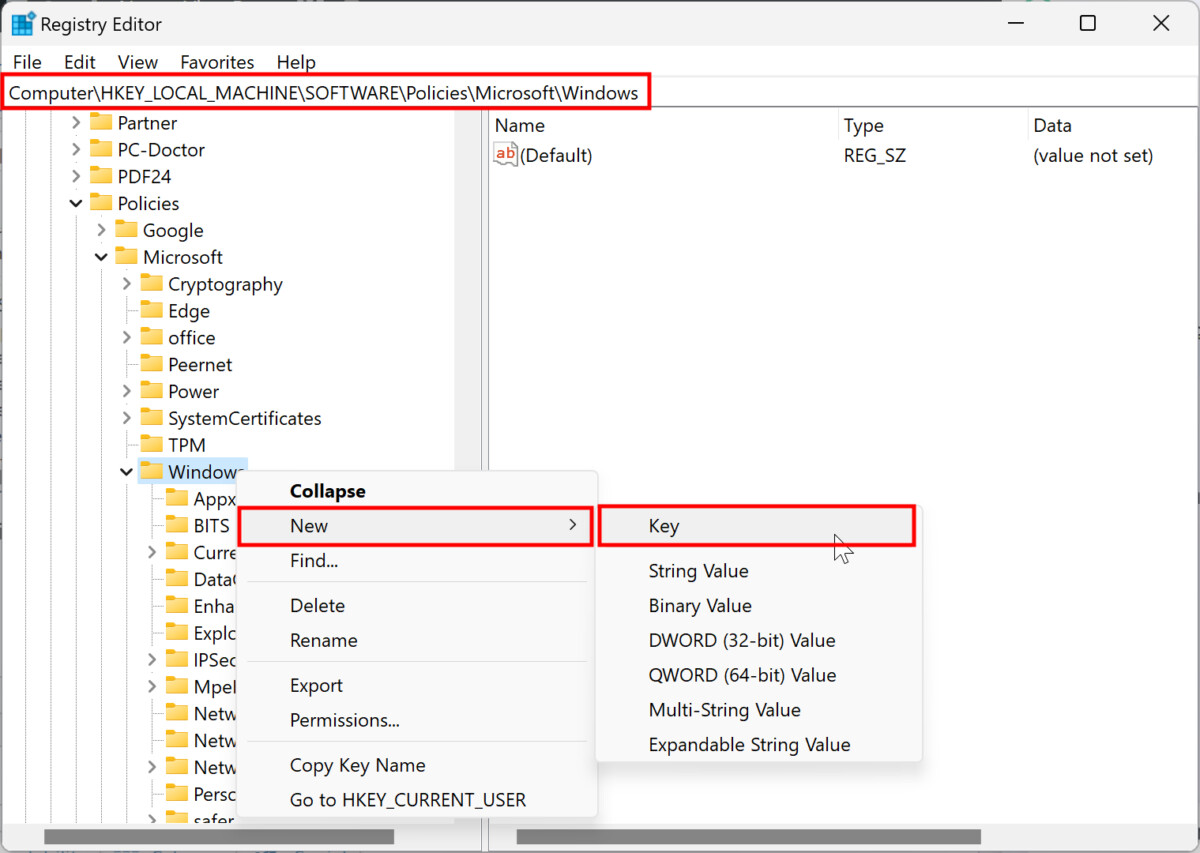
Step 2: When the Registry Editor opens, go to the following location:
HKEY_LOCAL_MACHINE\SOFTWARE\Policies\Microsoft\Windows
Step 3: After that, right-click on the Windows folder and select New > Key and name the newly created key as “Explorer.”

If the Windows folder is already present, then skip this step.
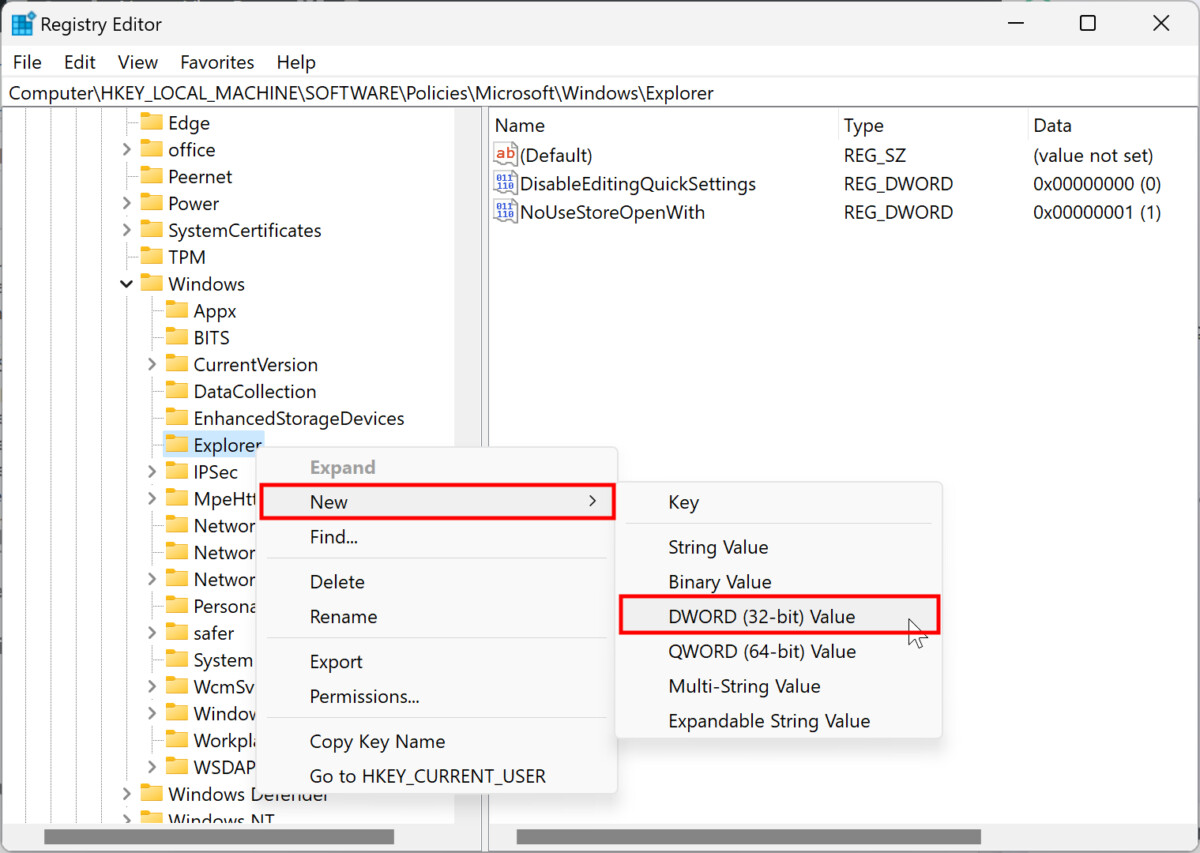
Step 4: Right-click on the “Explorer,” select New > DWORD (32-bit) Value, and name the newly created REG_DWORD as “DisableControlCenter.”

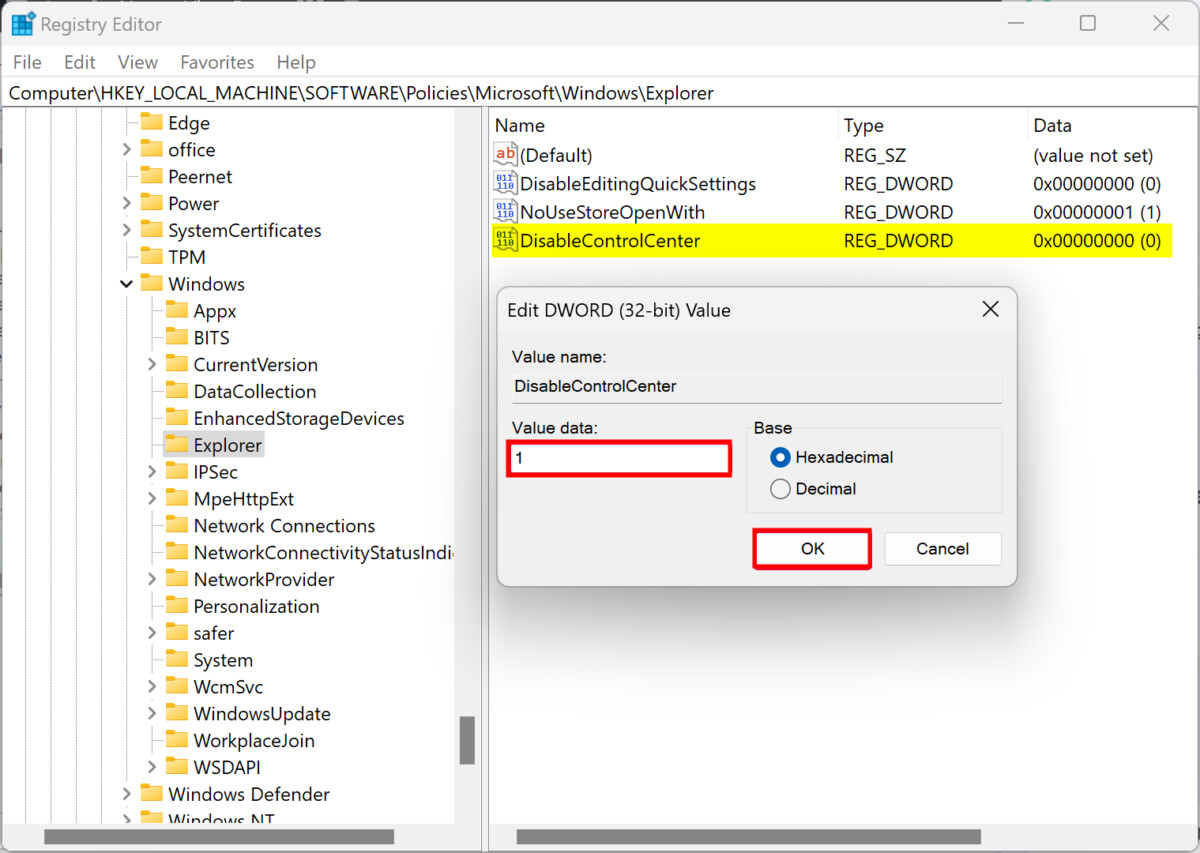
Step 5: Double-click on the DisableControlCenter REG_DWORD and set its Value data to 1 and then click the “Ok” button.

That’s it. After making the changes, restart your Windows 11-powered computer for the changes to take effect. When the computer restarts, you will notice that the Quick Settings options available from the taskbar have now been disabled and you cannot use them anymore. If you want to bring the Quick Settings menu back, then change the value for DisableControlCenter from 1 to 0 and you will get the Quick Settings back on your Windows 11 computer.
