On computers powered by Microsoft’s Windows operating system, including the latest Windows 11, you just have to connect your ethernet port to the device or connect to a wireless network to get started using internet on the computer. The system automatically takes care of the configuration with the default settings to get you started quickly and to make the experience better.
In most cases, the router’s Dynamic Host Configuration Protocol (DHCP) server is responsible for assigning a TCP/IP configuration to the device in the network, including those powered by the Windows 11 OS. It assigns a dynamic IP in most situations but there’s a way to get Static IP assigned.
Sometimes, you may need a Static IP assigned to your device, for whatever reasons. There are multiple ways to assign a Static IP address to your Windows 11 computer for this guide, we will pick the option using Settings app.
In this step-by-step guide, we will show you how to quickly and easily assign a Static IP address to your computer running the Windows 11 operating system using the built-in Settings application.

How to easily configure Static IP in Windows 11
Step 1: Open the Settings application on your Windows computer.
Step 2: When the app opens, select the “Network & Internet” option from the left sidebar.
Step 3: Select the “Ethernet” option from the right-side pane.
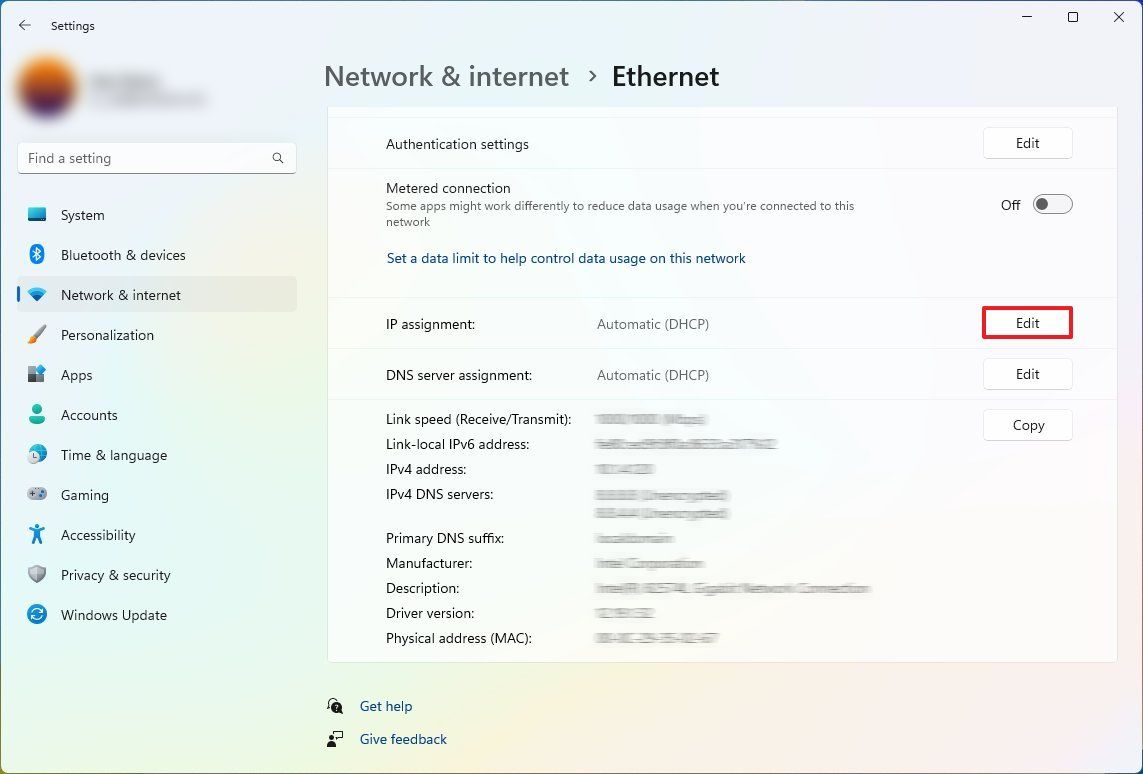
Step 4: On the Ethernet settings page, click on the “Edit” button next to the IP Assignment.

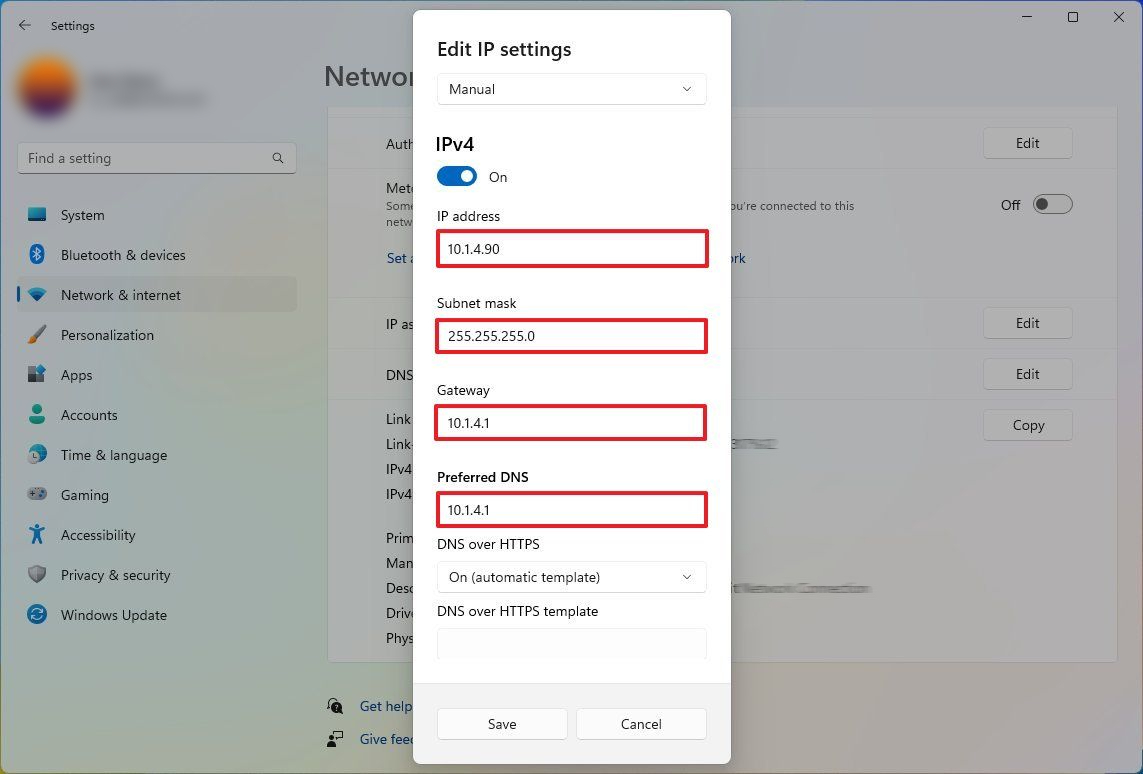
Step 5: When the Edit IP Settings dialog box appears, select “Manual” option from the drop-down menu.
Step 6: Turn the toggle switch ON for the IPv4 option and fill the rest of the fields, including IP address for the computer, subnet mask for the configuration, default gateway address, and preferred DNS address.

Step 7: After making the changes, click on the “Save” button.
That’s it. Once you have followed the above-mentioned step-by-step guide on your computer, then you have successfully configured and assigned a Static IP address to your Windows 11-powered device. If everything is configured correctly, then you will be able to connect and use internet on your computer.

