Windows 10 operating system automatically downloads and installs new quality or cumulative updates on the computer. While the auto-update feature ensures that the device remains up-to-date with the latest security patches and performance enhancements, it has not been an ideal feature for all users as sometimes the updates come with a few bugs, affecting the experience.
If you are among those users who have faced such issues with the Windows 10 operating system, then you can simply disable the auto-updates on your computer. In this guide, we will show you how to disable this feature using the Registry Editor.

Disable Auto Updates using Registry Editor
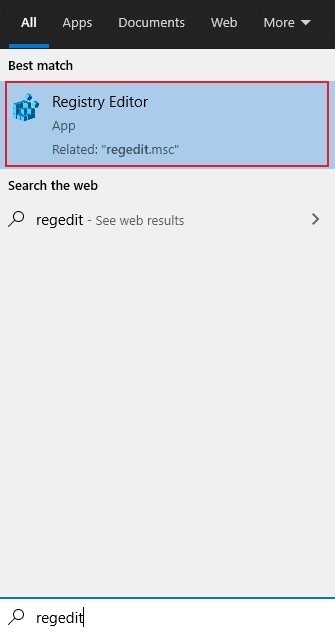
Step 1: Open the Registry Editor on your computer. For this, open the start menu and search for the term ‘Regedit’. Now, from the search results, click on Registry Editor to open the application.

Step 2: In the Registry Editor, navigate to the following path:
HKEY_LOCAL_MACHINE\SOFTWARE\Policies\Microsoft\Windows
Step 3: Now, click on the WindowsUpdate folder. If it doesn’t exist, right-click on the Windows folder and from the options, select New and from the drop-down menu, click on the ‘Key’ option. Name the newly created key as ‘WindowsUpdate’.
Step 4: Now, right-click the newly created key, select the ‘New’ submenu, and then choose the ‘Key’ option.

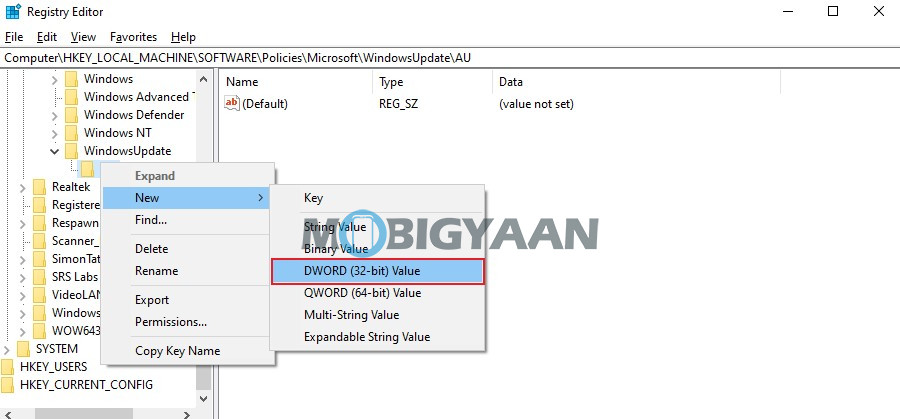
Step 5: Name this newly created ket as ‘AU’. Then, right-click on the AU key, select New > DWORD (32-bit) Value.
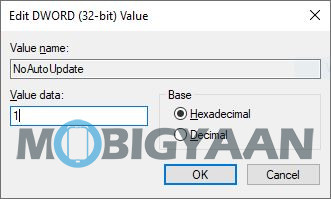
Step 6: Make sure to name this new key as ‘NoAutoUpdate’. After that, double-click the NoAutoUpdate key and change its value to ‘1’ and then click the ‘Ok’ button.

It’s a good idea to restart your computer after you make these changes. Now, once the process is completed, you will notice that your Windows 10 computer no longer installs the monthly updates automatically.
To install the new updates on your computer, you will now need to click the Check for Updates button in the Windows Update settings and if the update is available, you will be able to download and install it.

