In the latest Windows 11 operating system, Microsoft is using the blur effect of the login screen which puts the focus on the login credentials that you are tying. This helps to avoid distraction as you will see the login screen background with acrylic blur.
For this, the Redmond-based tech giant is following the Fluent Design paradigm which has been adopted from its predecessor, which has the same look and feels since 2019.
However, if you are among those users who don’t want the blue effect and instead prefer a clear-looking background, then here is a step-by-step guide on how you can do that. While there are a few ways that this can be done, in this guide, we are explaining a process that is the most easier, using the Settings application.
How to disable blur in Windows 11 login screen background
Step 1: Open the Settings application on your Windows 11 computer. For this, you can press the Windows + I keys on the keyboard and then select the “Settings” option from the context menu.
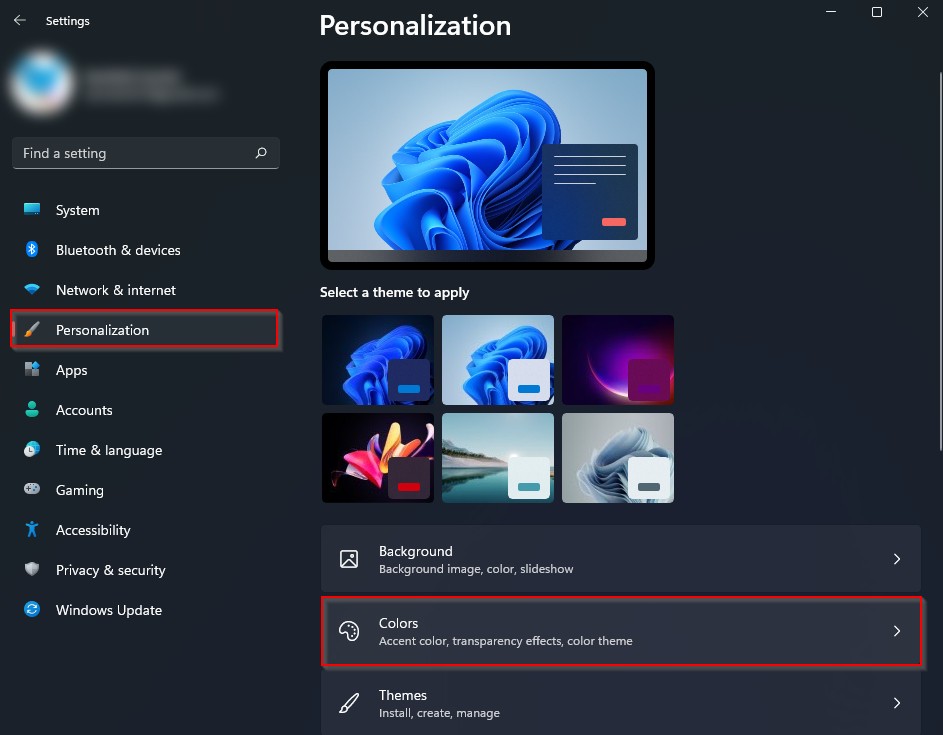
Step 2: Now, in the Settings app that you just opened, select the “Personalization” option from the left side pane.

Step 3: After that, on the right-side pane, select the “Colors” option.
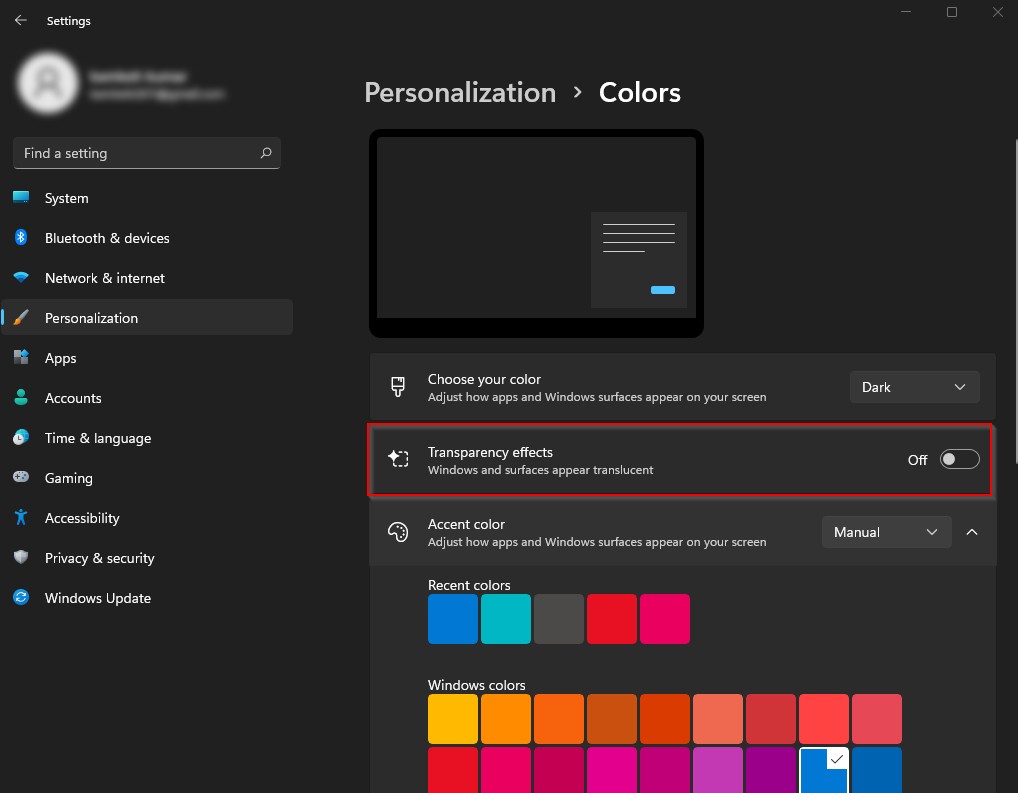
Step 4: Now, turn off the toggle for the “Transparency effects.”

That’s it. After completing the above steps, the blur background effect on your Windows 11 computer’s login screen will be immediately turned off. However, do note that the effect applies to other aspects of the system as well and the Start Menu, as well as the Taskbar, will look a bit less fancy.
