Windows operating system, including the latest Windows 11 from Microsoft, comes with a Search Indexing feature. It allows your computer to search through every folder and file and give you a result based on a word or metadata. This is a quicker alternative to searching an item manually. It works for most apps such as File Explorer, Groove, and even Photos. Web-based applications such as Microsoft Edge and Cortana also use the feature to their advantage.
While the feature is quite useful, easier to use, and has become more efficient, but it makes the device slower and the effect is felt more strongly if your computer is running with low specifications. If you are noticing that your computer is getting slower, you may want to try disabling Search Indexing. There are several different ways to do this but in this step-by-step guide, we will be using Services Manager in Windows 11 to disable search indexing.
How to disable Search Indexing in Windows 11
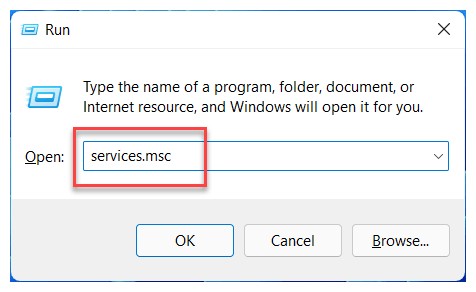
Step 1: Open the Run window on your computer. For this, press the Windows + R keys on your keyboard or click on the Start menu and then search for “Run” and click on the application from the search results.
Step 2: In the Run window that opens, type “services.msc” and then hit the Enter key.

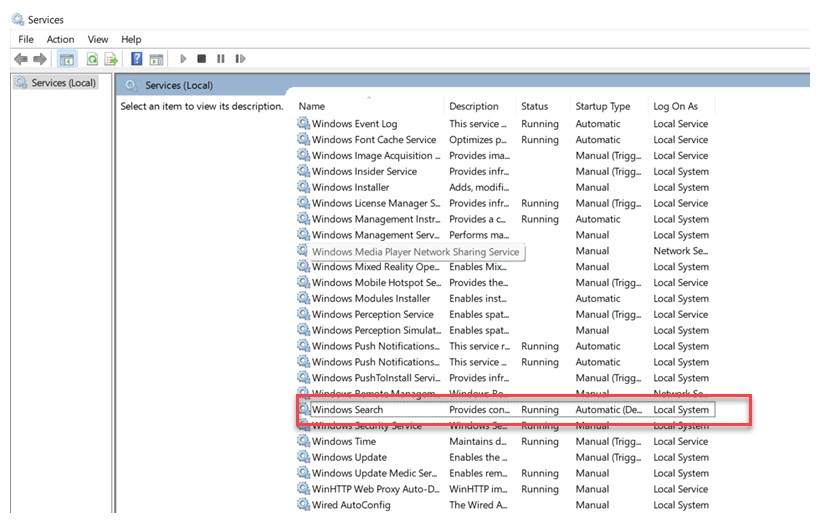
Step 3: Now, look for the “Windows Search” and double-click on it.
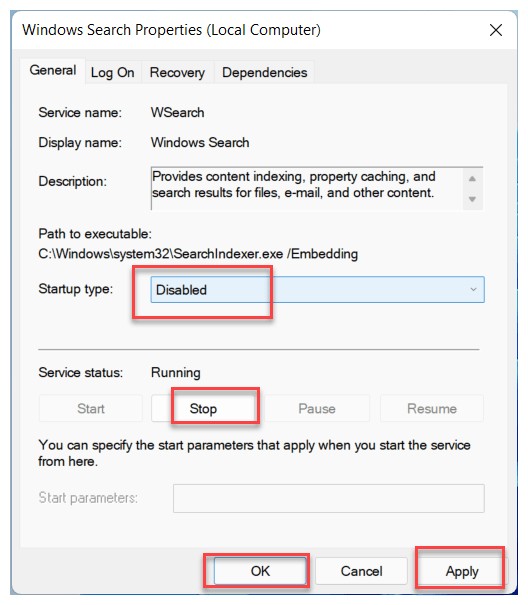
Step 4: When the new window for Windows Search opens, look for “Startup type” and select “Disable” from the options.

Step 5: Now, in the “Service Status” option, click on “Stop.”
Step 6: When you are done making the changes, click on the “Apply” and “Ok” button

That’s it. You will now need to restart your Windows 11 computer for the changes to take effect. Once the system restarts, the Windows Indexing feature should be disabled. To re-enable the feature, follow the same steps as above and change the status to enable to undo the changes on your device.

