Similar to the Voice Access feature available in the Windows operating system, the macOS from Apple also comes with a similar feature named Voice Control which is a part of the Accessibility features for the device.
When this feature is enabled on the system, a floating microphone button appears on the screen and whenever you speak a command, it will appear on top of the icon, and then the said command will be executed.
The Voice Control feature isn’t enabled on the device by default but if want to enable it, then here is a step-by-step guide on how you can do so easily through the System Preferences.
How to enable Voice Control on a Mac device
Step 1: Open System Preferences on your Mac device. For this, click on the Apple icon from the top-left corner on your screen.
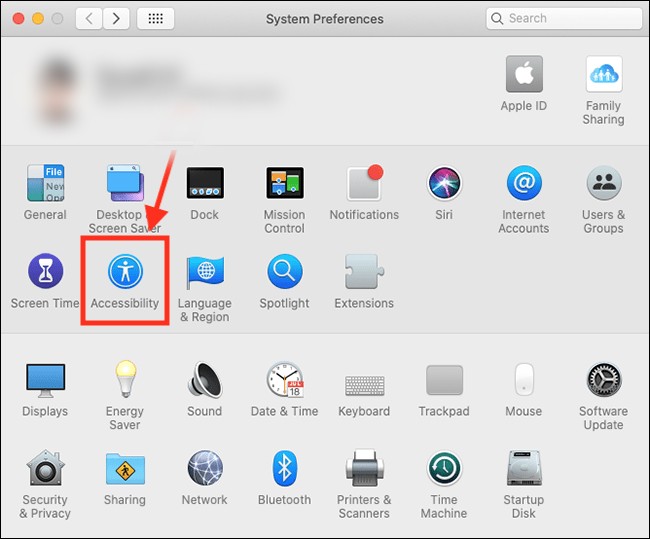
Step 2: When the System Preferences app opens, click on the “Accessibility” option.

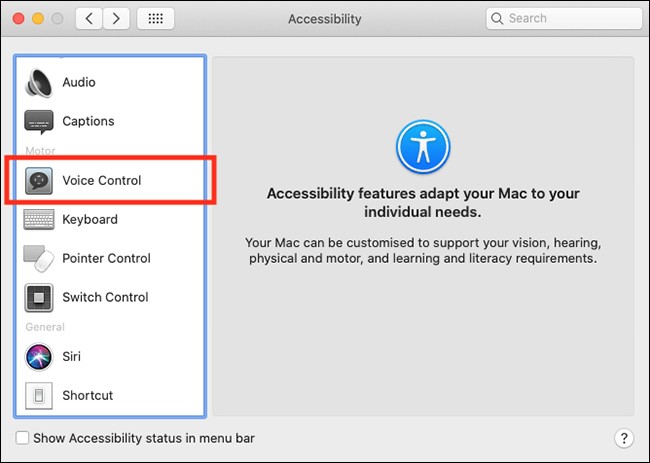
Step 3: Under Accessibility, select “Voice Control” from the left-side pane.

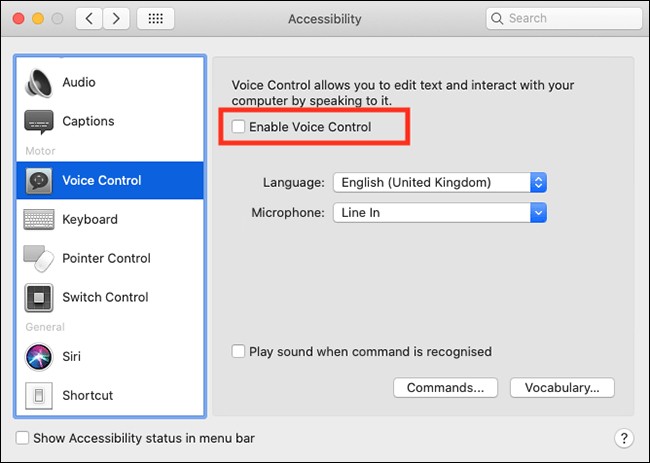
Step 4: On the right-side of the window, tick the checkbox for “Enable Voice Control” option.

That’s it. If the Voice Control software isn’t already installed on your computer, your device will now start downloading it. By default, the feature will be enabled with the language selected for setting up your Mac device.
If you want, you can change the selected language as well as use the drop-down list to change the source for the microphone. There’s also an option to “Play sound when command is recognised” which comes in handy if you need to get a confirmation that the system has registered a command.

