Apple’s devices, including Apple iPhone, iPad, and Macs are connected to the Apple ID account. The Apple ID has a Country or Region selected which is quite essential as it controls which applications and services are made available to the user, based on the location or the region selected for the Apple ID.
If you are trying to access something that isn’t available in your region or if you have just relocated or moved to another region, you may want to update or change the location in your Apple ID. While Apple allows users to change or update the Country or Region, it isn’t an easy or straightforward process.
In this step-by-step guide, we will show you how to change the location or region of the Apple ID account on your Apple iPhone.
How to change location or region on Apple iPhone
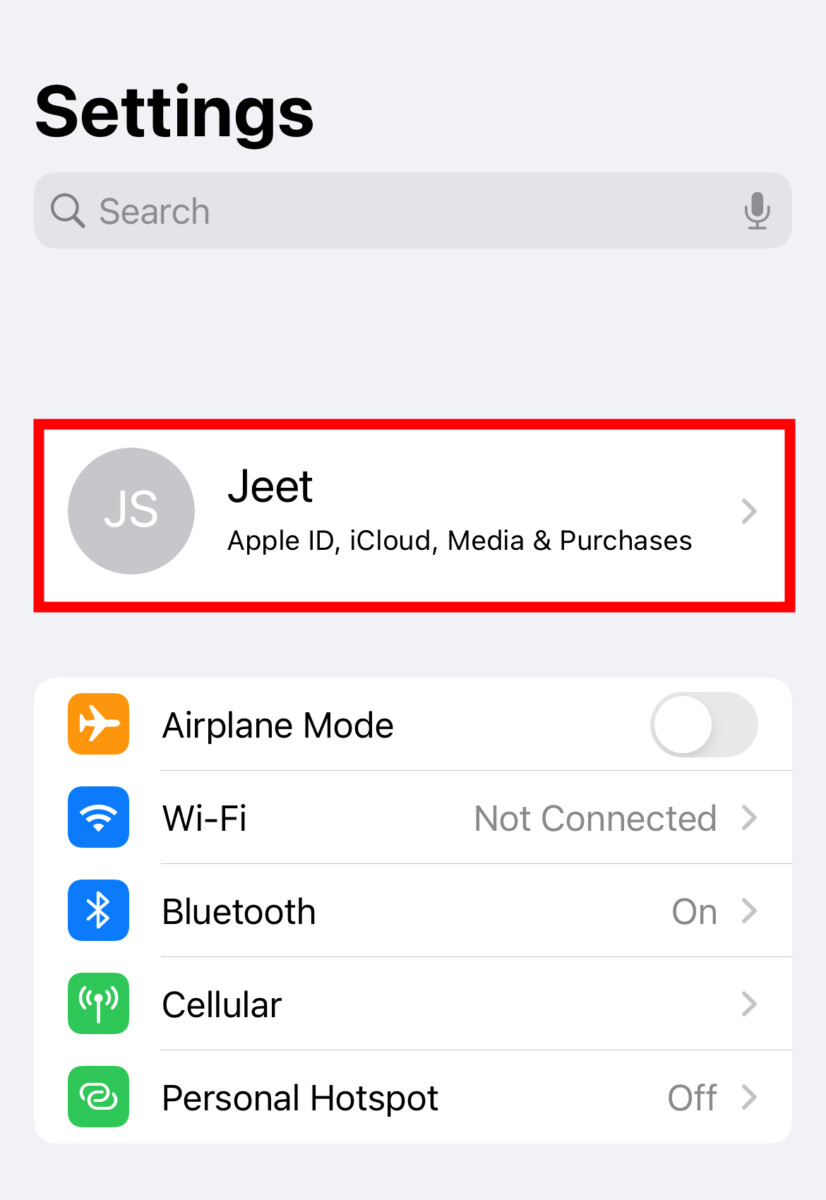
Step 1: Open the Settings application on your Apple iPhone.
Step 2: When the app opens, tap on your name which is at the top of the screen to open Apple ID settings.

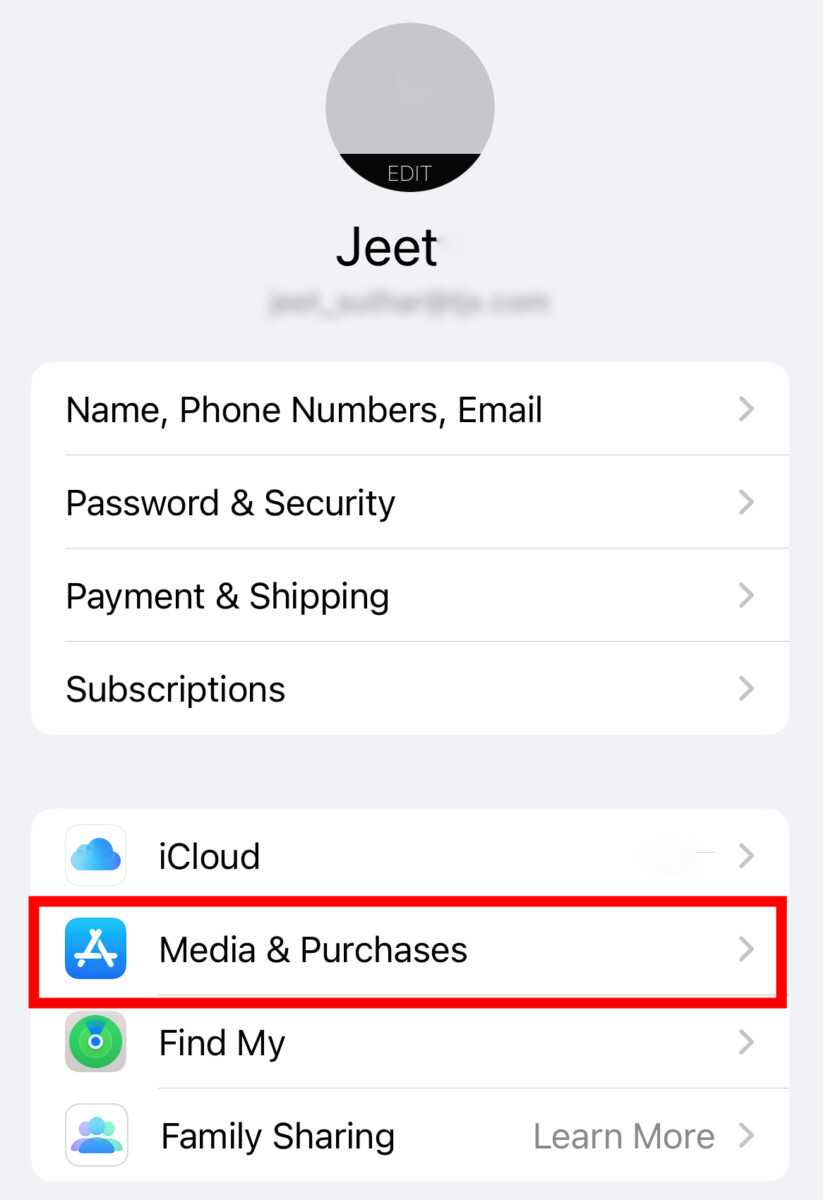
Step 3: On the Apple ID settings page that opens, tap on the “Media & Purchases” option.

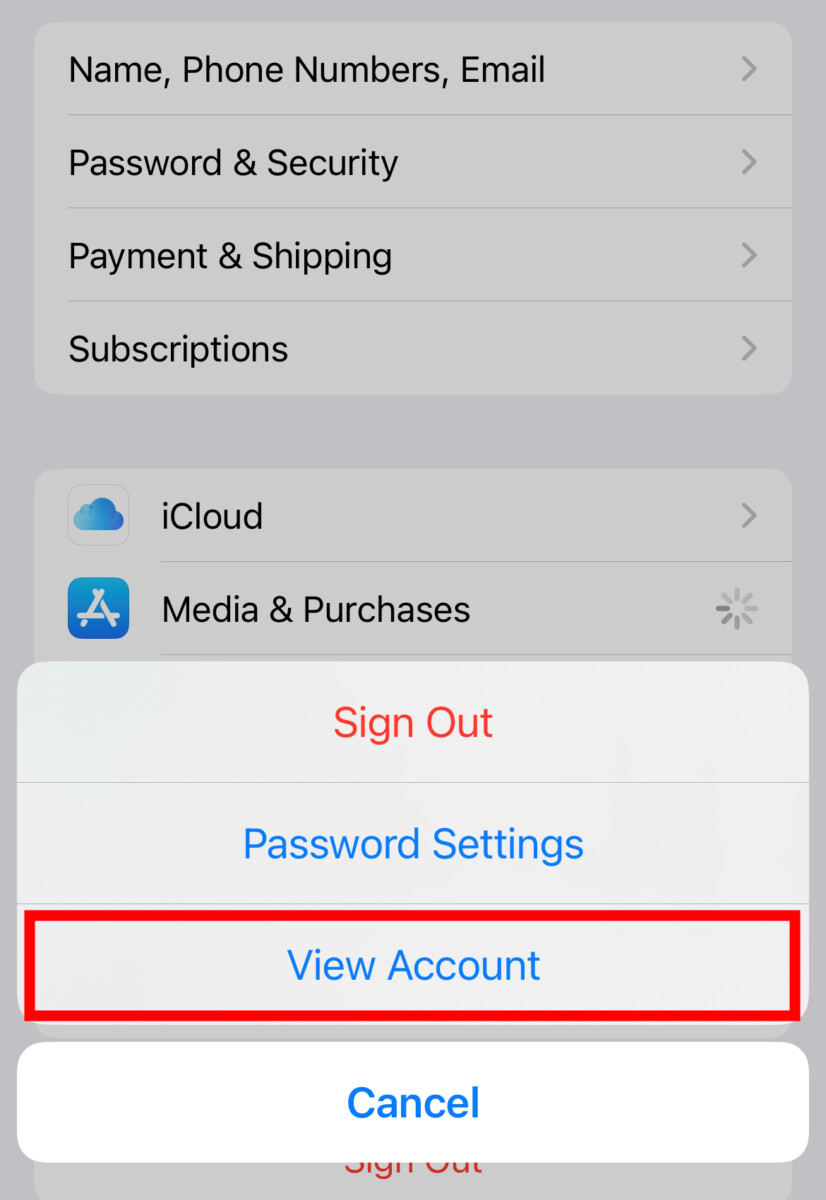
Step 4: Select the “View Account” option from the pop-up menu that appears on the screen. When you tap on the option, you might be asked to sign in to the Apple account.

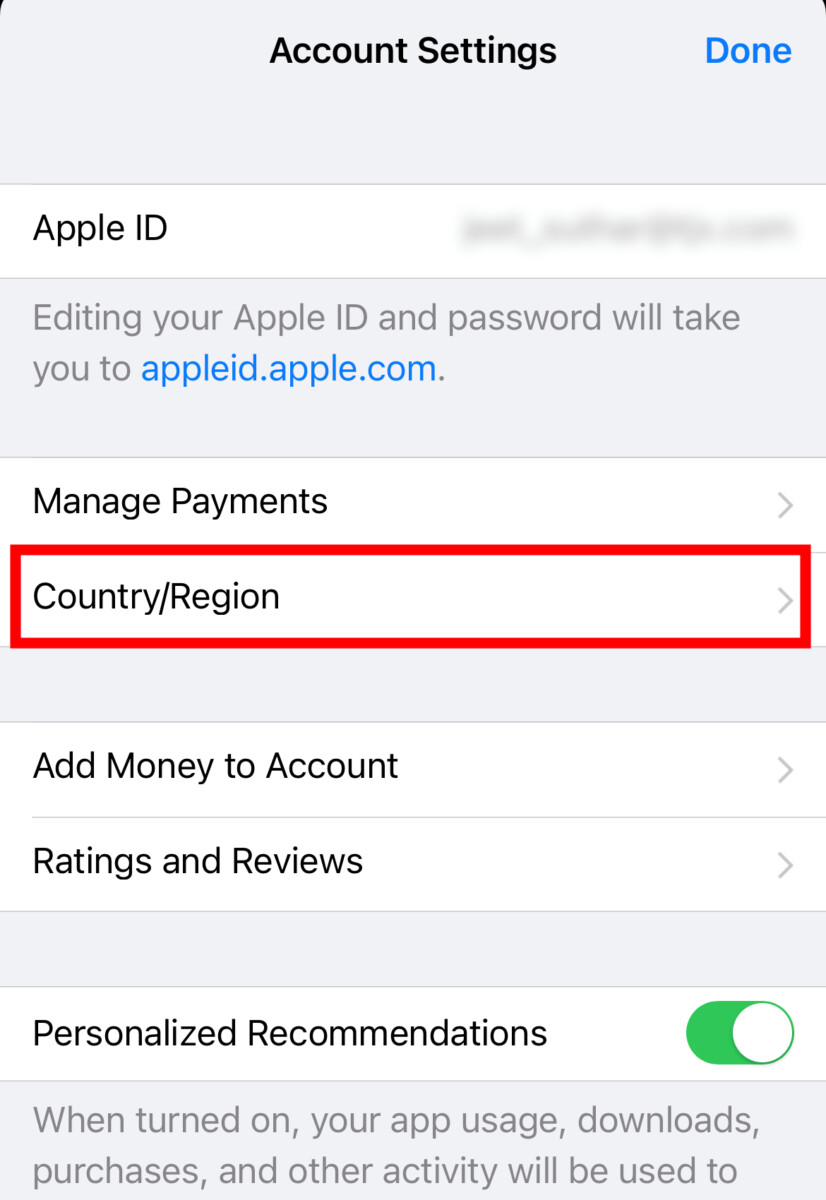
Step 5: After that, tap on “Country/Region” and on the Account Settings page, tap on the “Change Country or Region” option.

Step 6: Select the new country or region from the list and then review the Terms & Conditions.
Step 7: Select the payment method and enter the new payment information and then tap on the “Next” button.
That’s it. Once you have followed the above-mentioned step-by-step guide on your Apple iPhone, then the Country or Region for the Apple ID on your smartphone has been changed to the one you selected by following this guide.
Do note that the location cannot be changed if there’s a balance in your Apple ID. In such a case, you will need to spend the amount before changing the region. You will also need to cancel the subscriptions and wait till the end of the current subscription period to change location.

