The Windows 11 operating system comes with several features which may not be used daily by the users but can come in handy when it’s needed. One such feature is the ability to take screenshots which the user can easily do using the Windows hotkeys.
While taking a screenshot is easier as the user just needs to press the hotkey, saving the captured screenshot as an image is a manual process as the user needs to copy the screenshot from the clipboard, paste into it an app like Paint or similar, and then save it as an image.
If you have OneDrive installed on your computer, then this process can become easier and going the step further, it can also automatically save the screenshot to the cloud storage so that the user can access it from anywhere without having to physically access the device from which the screenshot was captured.
In this step-by-step guide, we will show you how you can quickly and easily configure the OneDrive settings on your Windows 11-powered computer to automatically save the captured screenshots to the cloud storage.
How to auto-save screenshots in Windows 11 to OneDrive
Step 1: Open the OneDrive Settings on your Windows 11-powered computer by right-clicking on the OneDrive icon from the taskbar.
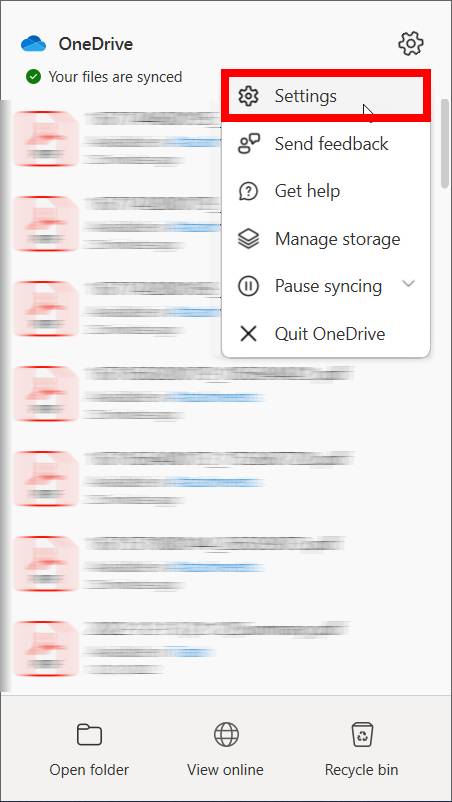
Step 2: Click on the cog icon and then Select the “Settings” option from the context menu that appears after clicking on the icon.

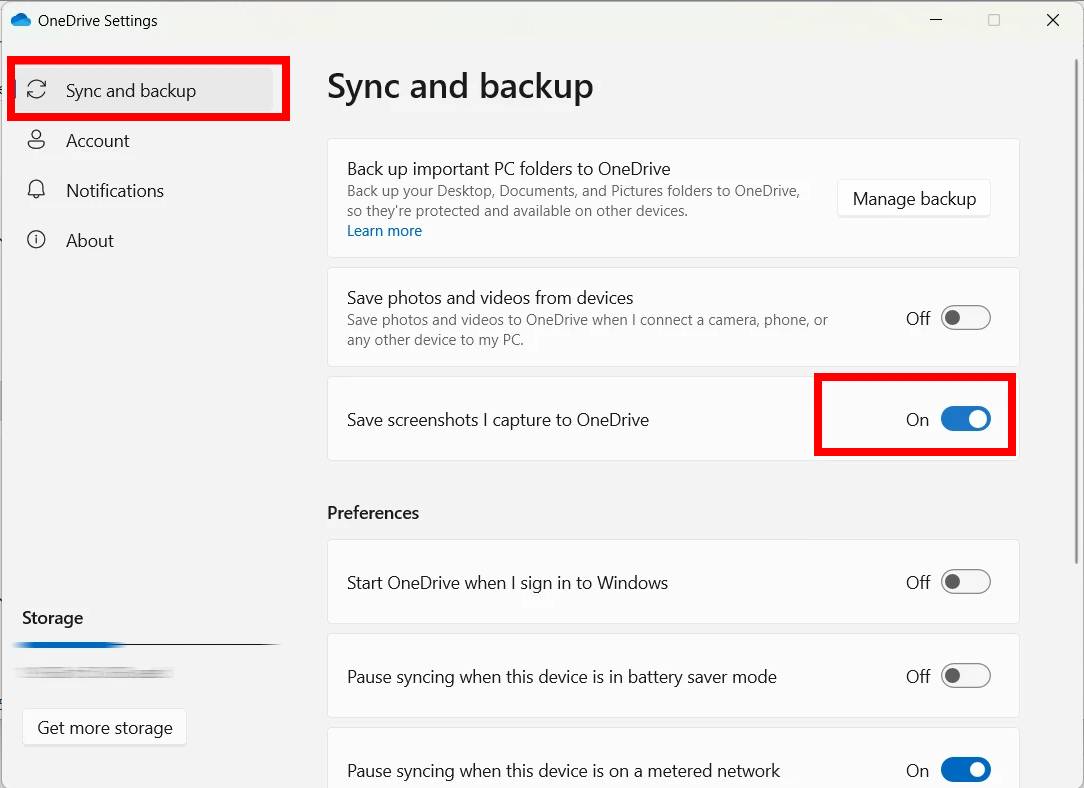
Step 3: When the OneDrive Settings window opens, under the “Sync and backup” section, enable the toggle switch for the “Save screenshots I capture to OneDrive” option.

That’s it. Once you have followed the above-mentioned guide and changes the settings, then the system will automatically save the newly captured screenshots on your computer to OneDrive, without you having to manually update the files to the cloud storage.
This will be applicable whenever you take screenshots natively on your Windows 11 system using the hotkeys like PrtScn and Alt + PrtScn. You will no longer need to manually paste the image from the clipboard and then save it to the computer and move to OneDrive.

