The new macOS Ventura operating system from Apple comes with several new features and functionalities, and one of them is the way the company is now treating the updates on Mac devices.
For those devices that are running the new macOS Ventura, Apple can deliver security updates to the computers without the need to update the entire operating system. These are the security updates that help the device as well as the user’s data to be safe and secure.
The feature, called Rapid Security Response, offers an option that can let users avoid the need to update the entire operating system and allows users to get important security improvements for the devices even faster and have them applied automatically between standard software updates.
For some reason, if you want to disable the automatic installation of the security response and software updates on your macOS-powered devices, then you can do so. In this step-by-step guide, we will show you how to quickly and easily disable Rapid Security Response software updates in macOS Ventura.
How to disable Rapid Security Response software updates in macOS
Step 1: Open the System Settings application on your Mac device by clicking on the Apple icon from the top-left corner and selecting “System Preferences” from the drop-down menu.
Step 2: When the application opens, select the “General” tab from the left sidebar.

Step 3: After that, select the “Software Update” option from the menu.
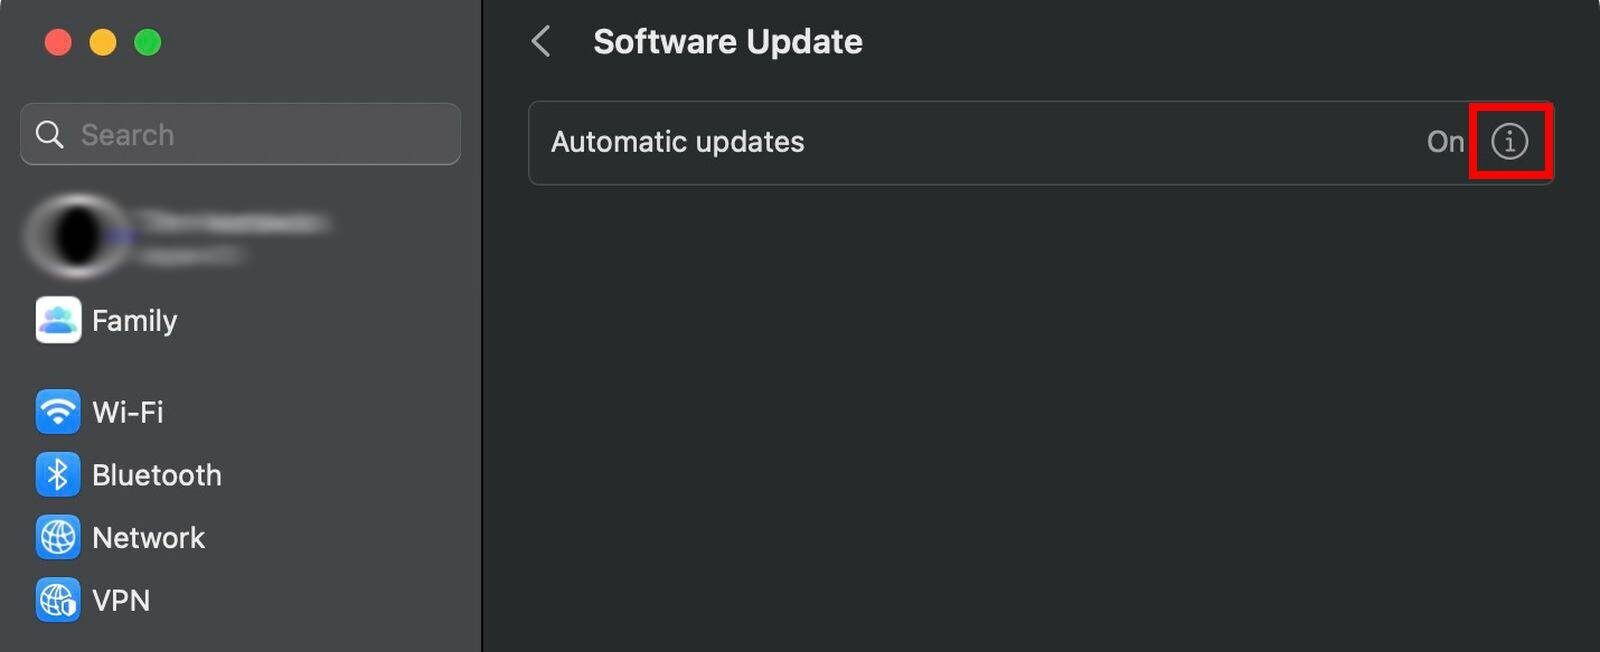
Step 4: In the Software Update settings, click on the “i” icon next to Automatic Updates.

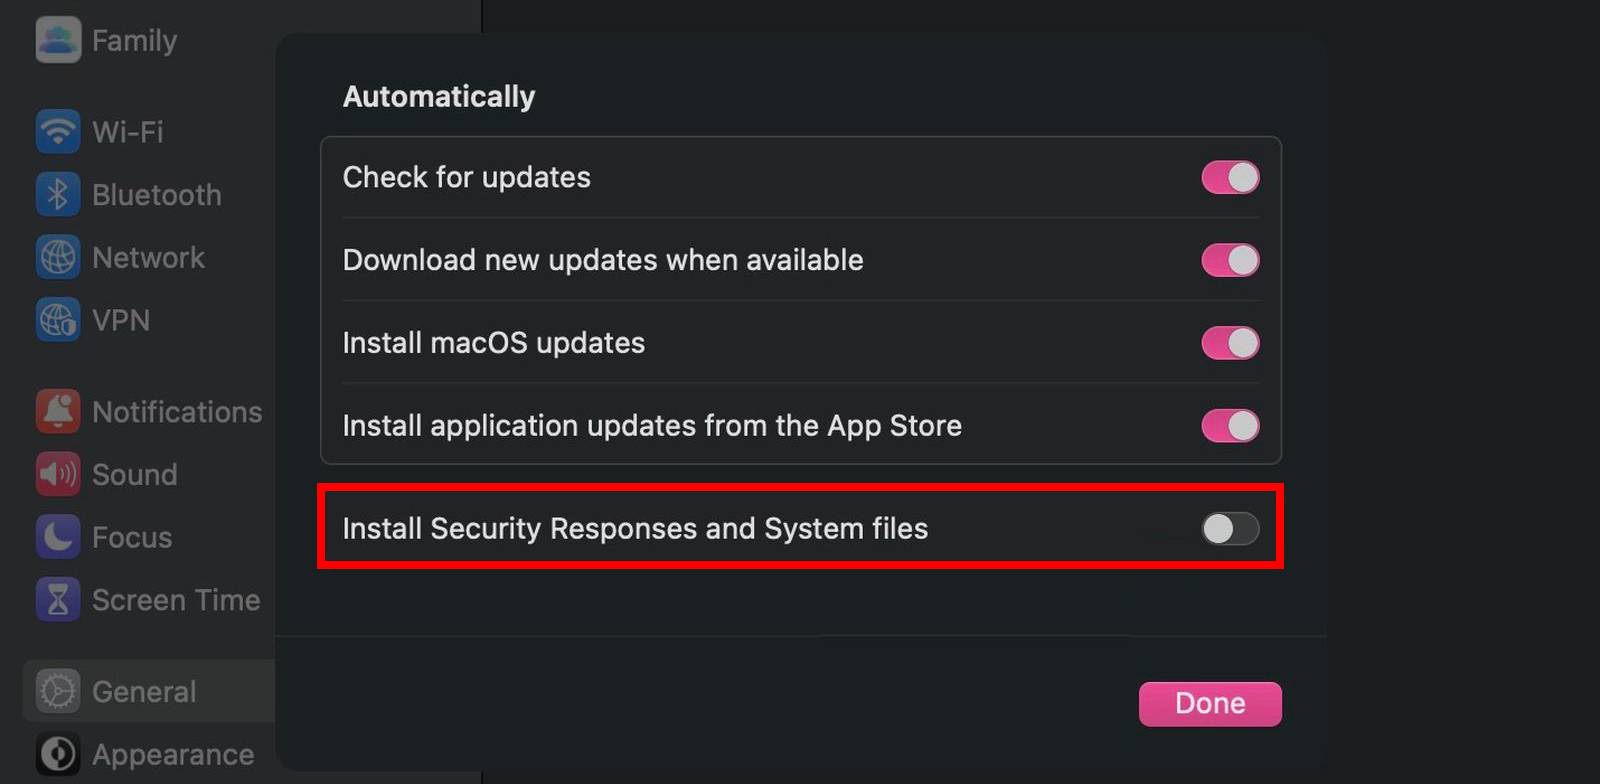
Step 5: On the screen that loads, toggle off the switch for the Install Security Responses and System files” option.
That’s it. Once you have followed the above-mentioned step-by-step guide on your Mac device, then the updates for the security responses won’t be automatically installed on your device. Instead, the macOS will alert you as the new security response is available, and you will be presented with an option to install it.

![How to move icons on the left side in Taskbar [Windows 11] 3 How to change Windows account password using Command Prompt [Windows 11 Guide]](https://www.mobigyaan.com/wp-content/uploads/2022/10/Windows-11-75x75.jpg)