PowerShell from Microsoft is quite a powerful tool that comes with the Windows 10 operating system. It is enabled for all the users by default and given the range of tasks and actions that it can perform, it poses a high risk for regular users.
The tool is often used maliciously to spread malware through the network. It can be used by attackers to run malicious commands, access the file system, tweak registry settings, and more.
If you are not using PowerShell, then it is a good idea to disable the program on your computer. In this step-by-step guide, we will show you how you can easily disable the PowerShell in Windows 10 using the Local Group Policy Editor.
Disabling PowerShell in Windows 10
Step 1: Open the Local Group Policy Editor on your computer. For this, open the Start menu and search for “gpedit.msc.” Now, from the search results, click on the Local Group Policy Editor.
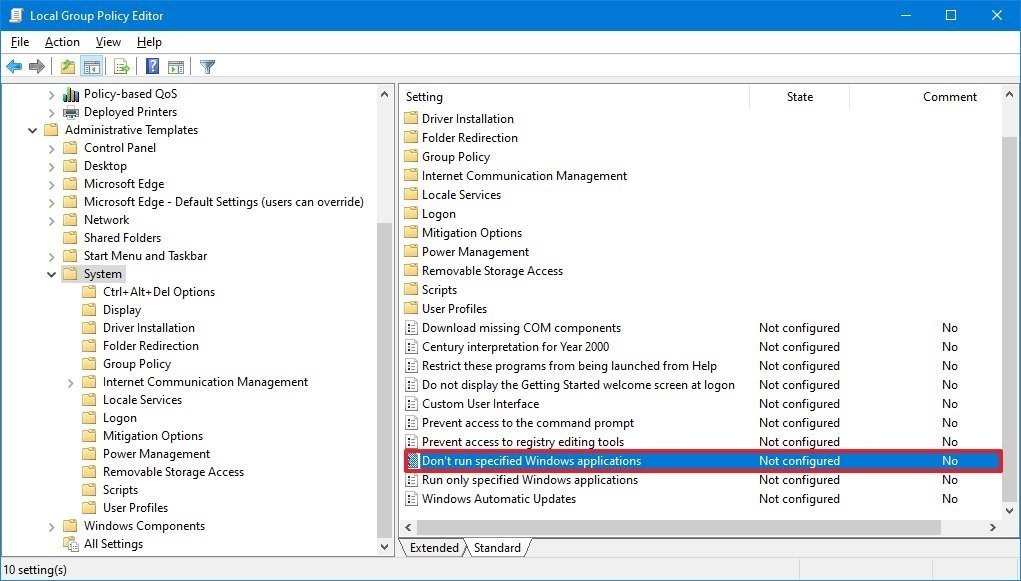
Step 2: Now, in the window that opens, go to the following location:
User Configuration > Administrative Templates > System

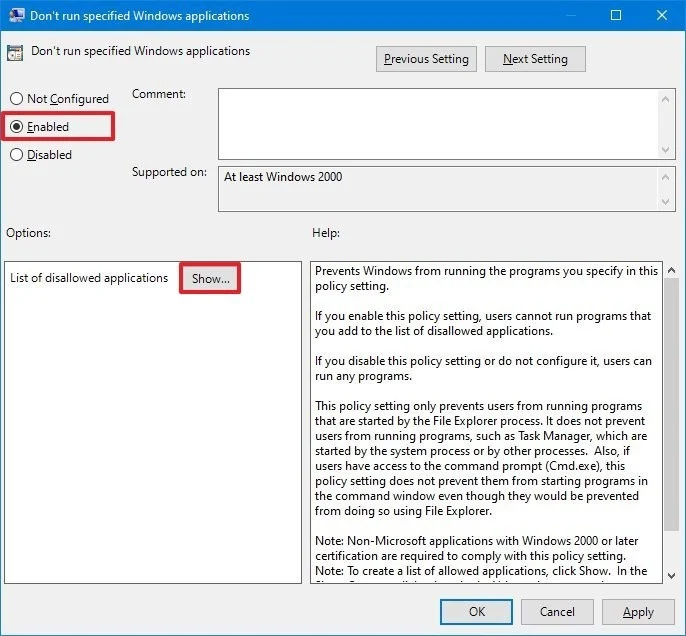
Step 3: On the right side section, double-click on the policy named “Don’t run specified Windows application.” In the window prompt that opens, select the “Enabled” option.

Step 4: In the same window, under the “Options” section, click the “Show” button.
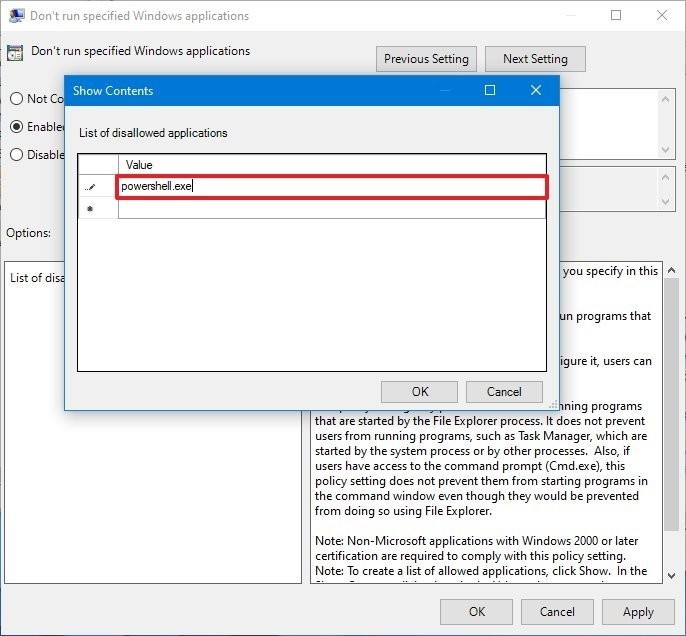
Step 5: Now, in the “Value” section, type “powershell.exe” and then click “Ok.”

Once you have completed all the steps mentioned above, the PowerShell application will be disabled on your computer. To re-enable using the app and to reverse the changes, follow the same procedure but in Step 3, just select “Not Configure” and the PowerShell will once again be able to run.

![How to add brightness slider in Notification Center [Windows 10] 4 How to enable or disable Xbox Game Bar in Windows 10](https://www.mobigyaan.com/wp-content/uploads/2021/01/windows-10-pc.jpg)