The context menu in the Windows operating system (the menu that appears when you right-click on your mouse) shows several functions that come are most commonly or frequently used. Similar to most other Windows 10 features, this one too can be customized by removing an option or adding a new one.
Disk Cleanup is an important utility tool from Microsoft that comes built-in the Windows operating system. It scans your computer’s hard drive for files that you no longer need such as temporary files, cached webpages, and rejected items that end up in your system’s Recycle Bin. However, the function is not present in the context menu.
In this step-by-step guide, we will show you to add the Disk Cleanup option to the context menu for the drives in your Windows 10 system.
How to add Disk Cleanup to the context menu for drives in Windows 10
Step 1: Open your Windows search and search for ‘Registry Editor’ and then hit Enter.
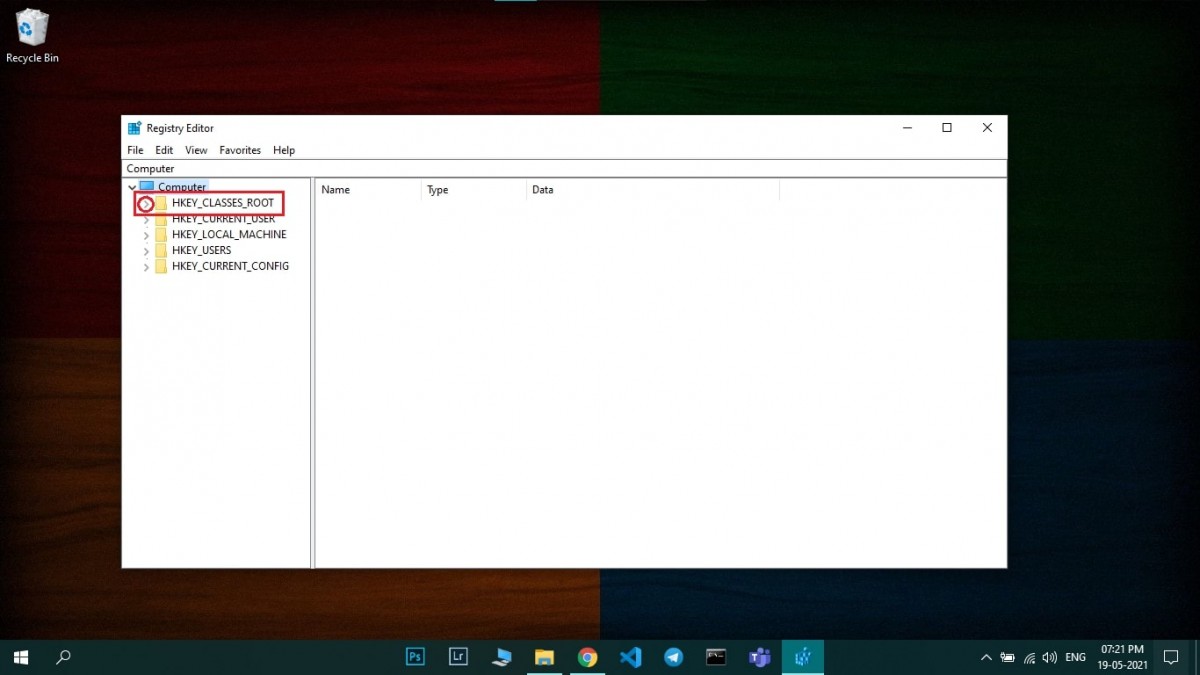
Step 2: In the Registry Editor, click on the drop-down menu for ‘HKEY_CLASSES_ROOT’ and scroll down to look for a folder named ‘Drive.’
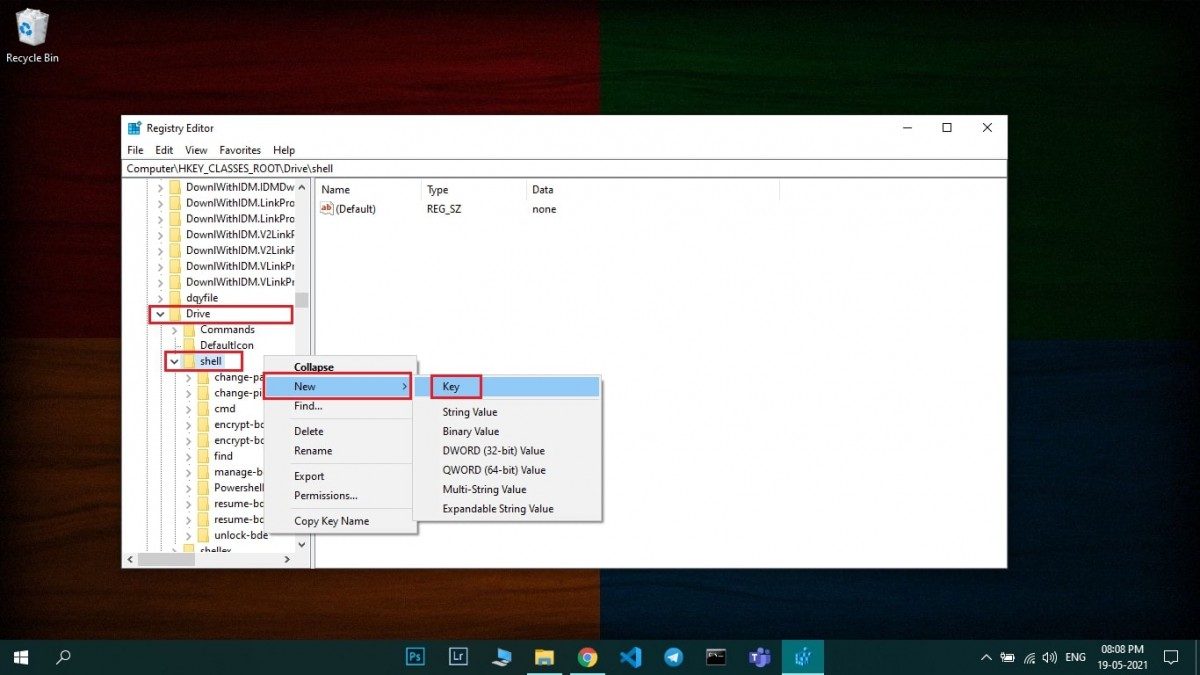
Step 3: Once you find the Drive folder, click on its drop-down menu and find ‘shell’. Here, right-click on the shell and then select New > Key and create a new Key.
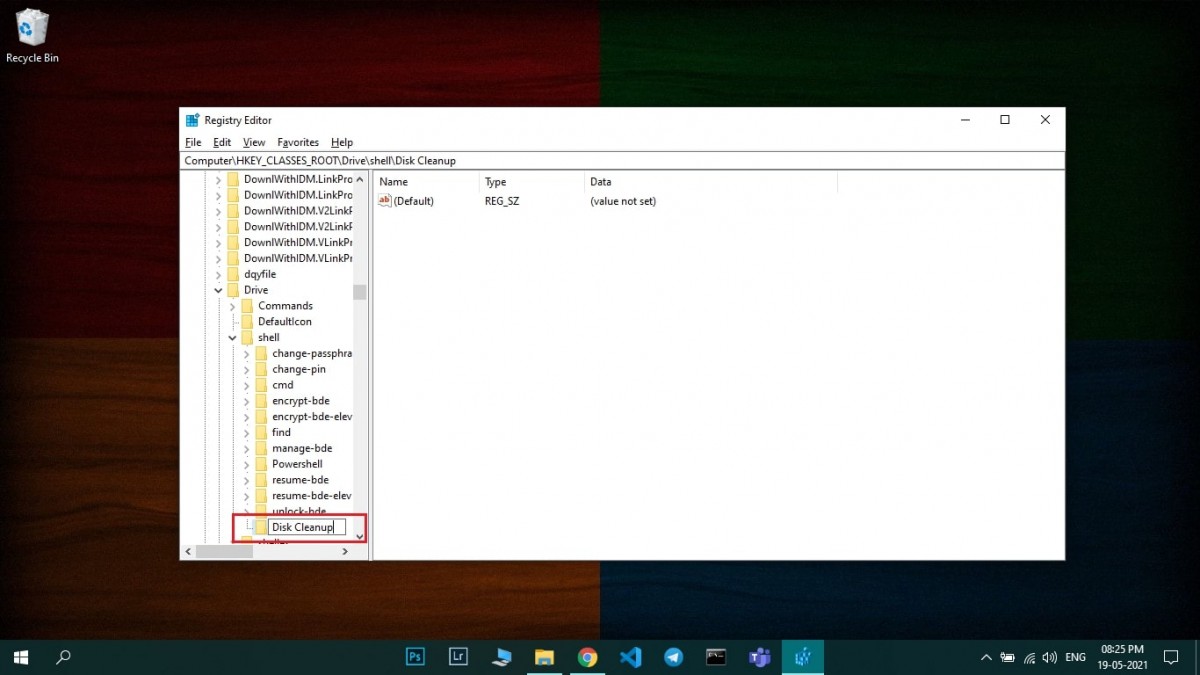
Step 4: Now, rename the newly created key as ‘Disk Cleanup.’
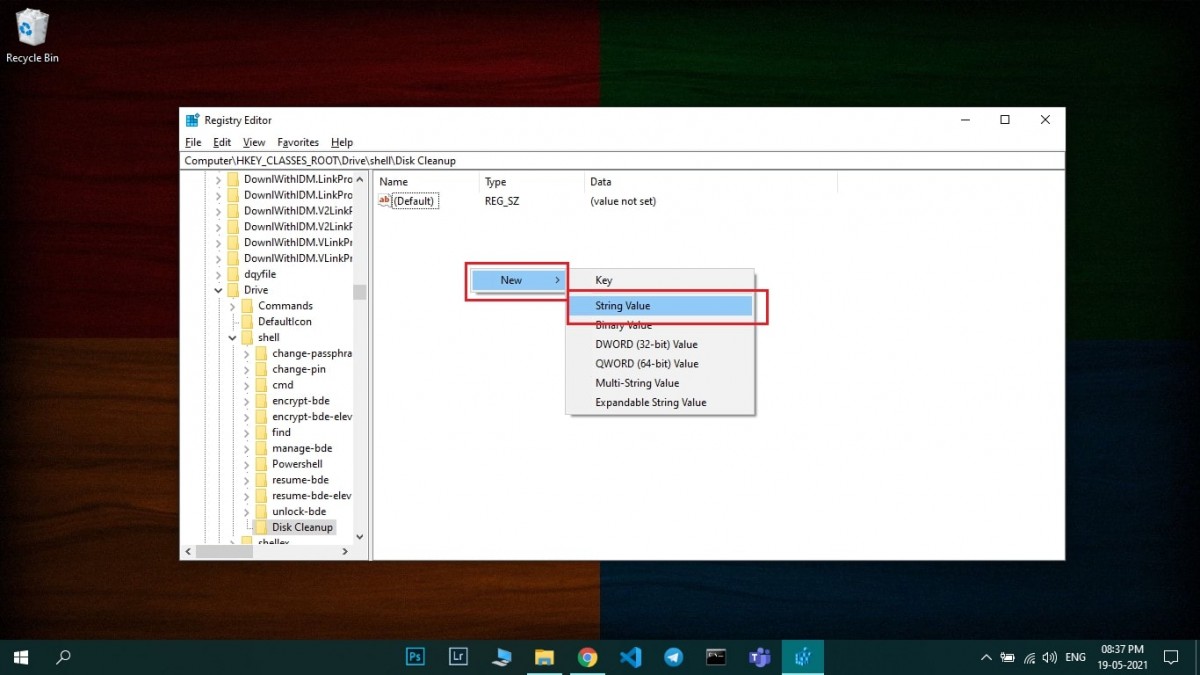
Step 5: Click on this ‘Disk Cleanup’ key and then right-click on the panel on the right-hand side. In a popup that appears, click New and select ‘New String Value.’
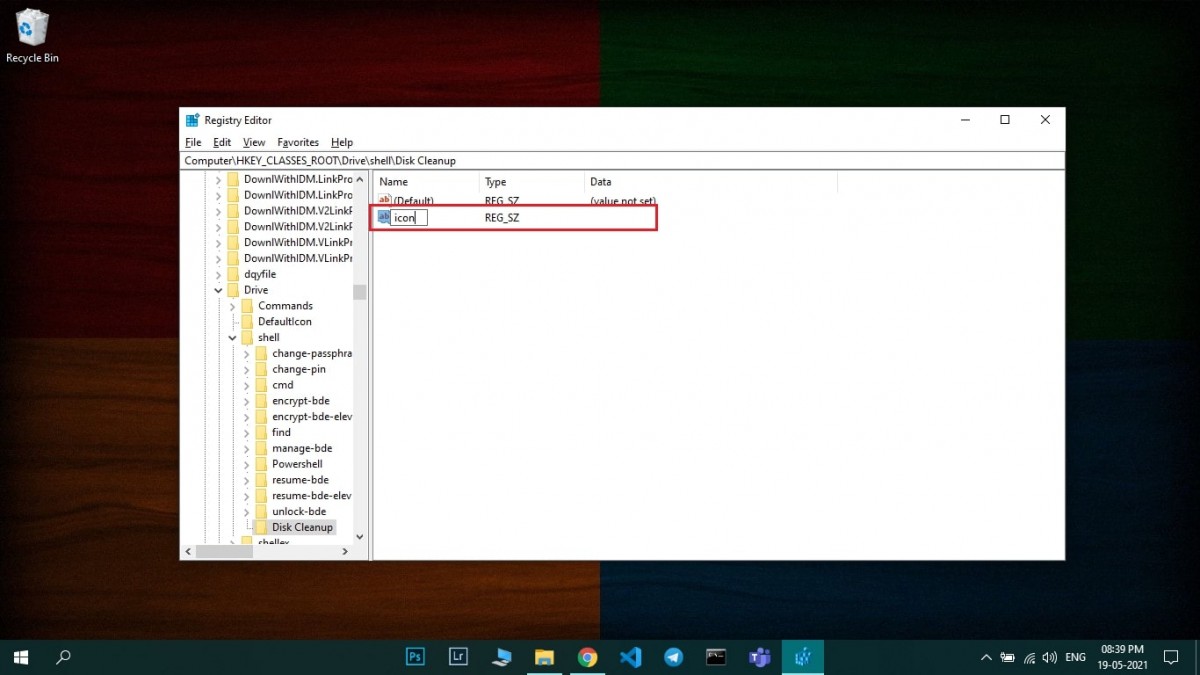
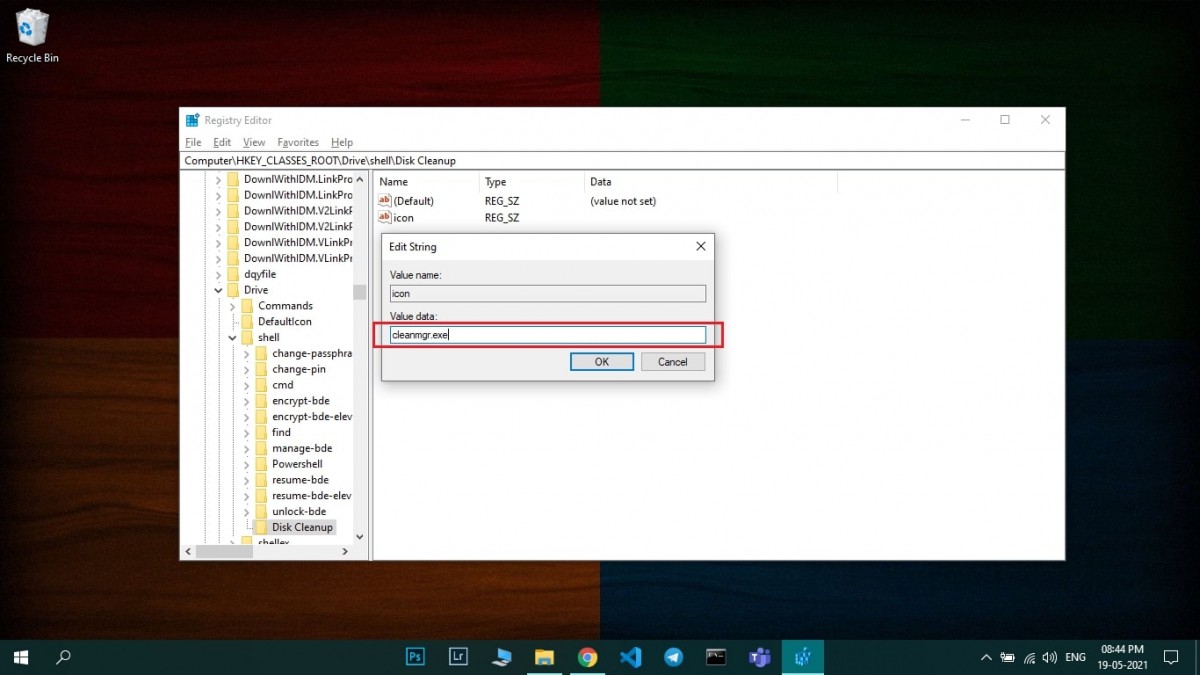
Step 6: Rename the file just created as ‘icon.’ After that, double left-click on ‘icon’ and a popup will appear asking for ‘Value data.’ In that box, type in ‘cleanmgr.exe’ and then press the Ok button.
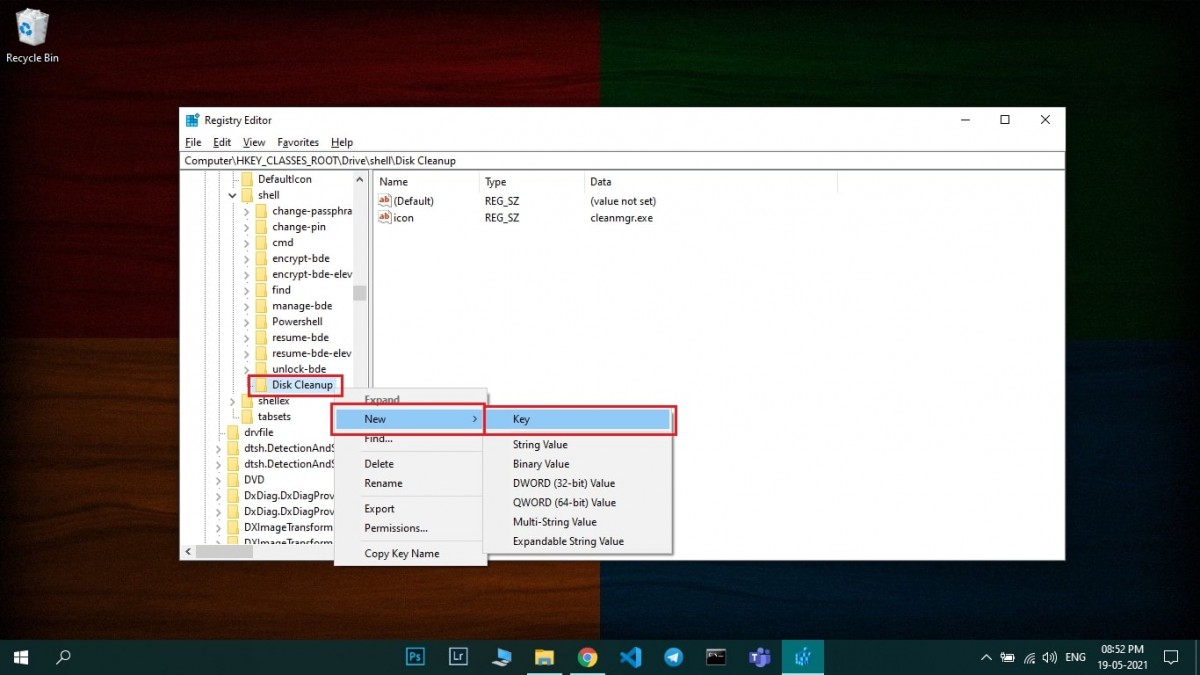
Step 7: Once done, come back to the left-hand side panel and right-click on ‘Disk Cleanup.’ and go the ‘New’ and then select the option to create a new ‘Key.’
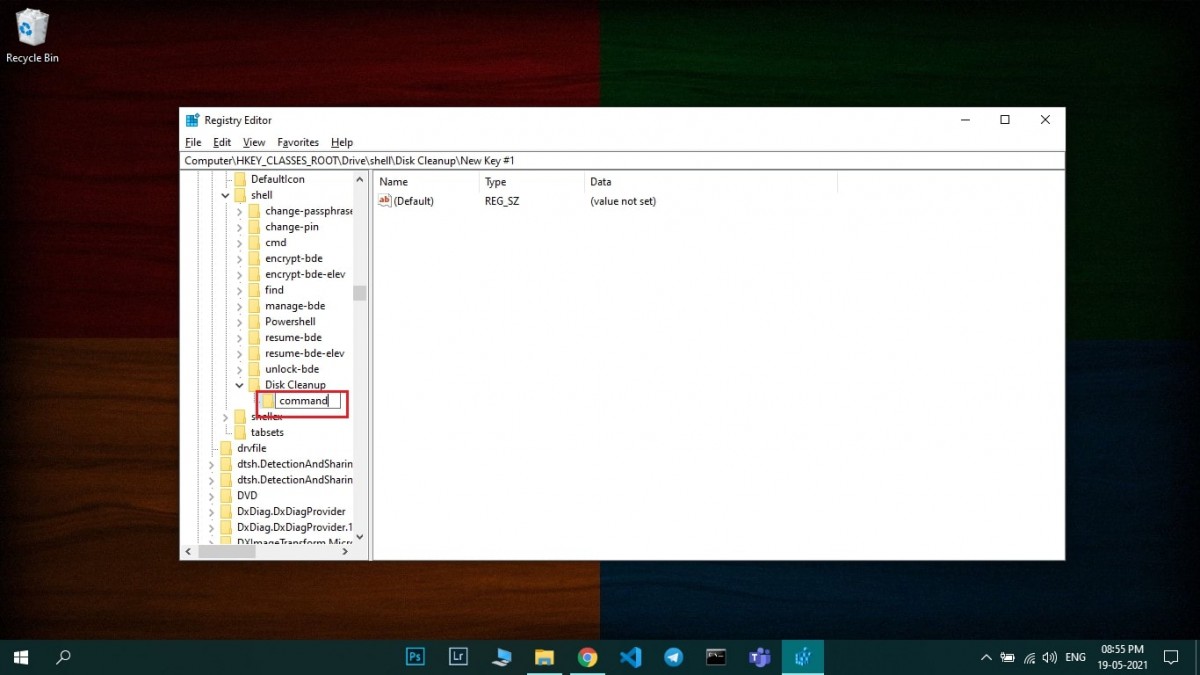
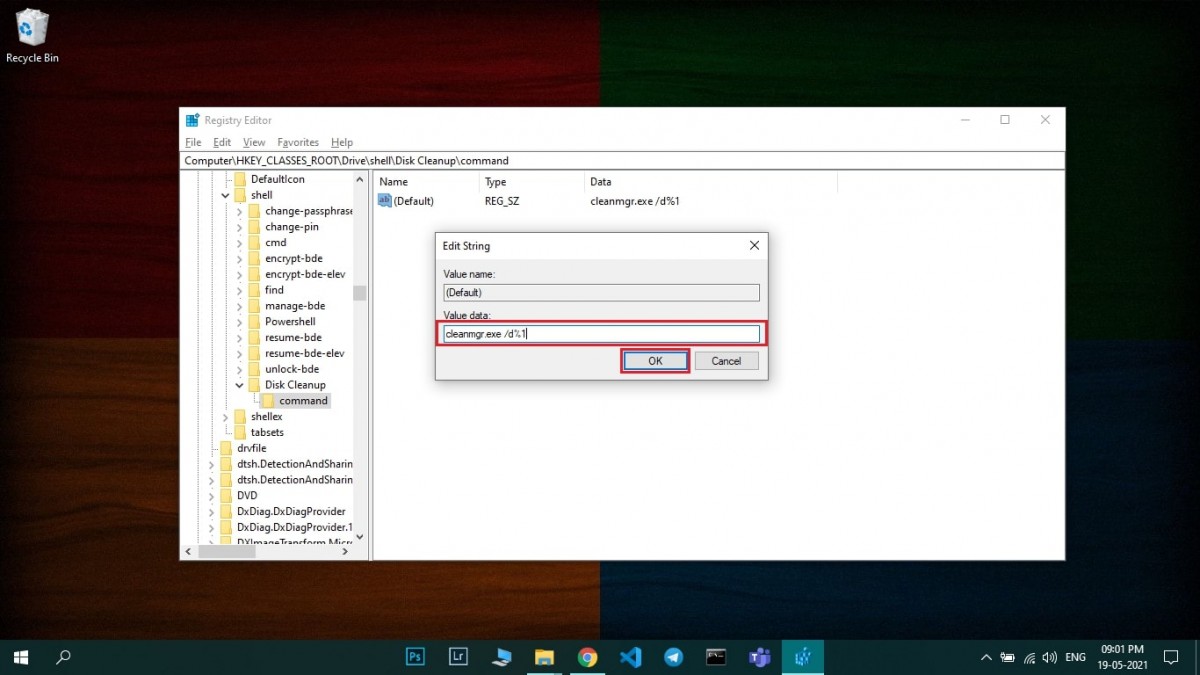
Step 8: Rename the key as ‘command.’ After renaming the key, you will find a file on the right-hand side panel, named ‘(Default)’. Double-click on that file and enter the value data: ‘cleanmgr.exe /d%1’, and press OK.
That’s it. To verify that the option has been added to the context menu, open ‘This PC’ on your computer and then right-click on any drive. The option of ‘Disk Cleanup’ should now be present in the context menu.
