Most of the applications and websites that you visit have trackers installed that help them to learn your usage pattern and help make their products better or serve you better or relevant content. However, not everyone is happy sharing their IP Address or location. So, to protect the user’s privacy, Apple has added a new feature called Private Relay. But it comes at a cost of potentially slowing down your internet speed.
The Private Relay feature, when enabled, redirects all the outgoing web traffic from your device to an Apple server that strips the IP address. Then Apple relays it to another third-party server that assigns a temporary IP address which is captured by the destination. It also blocks any tracker or website that creates your profile, thus safeguarding your location, IP address, and internet browsing history.
If you are not sure how to enable this Private Relay feature or if it has been enabled on your device and you now want to disable it, then here is a step-by-step guide to enabling or disabling this privacy-focused feature on your iPhone.
How to enable Private Relay on Apple iPhone
Step 1: Open the Settings application on your Apple from the home screen or the app library.
Step 2: After the Settings app has opened, click on the Apple ID Card or your profile at the top of the Settings screen.
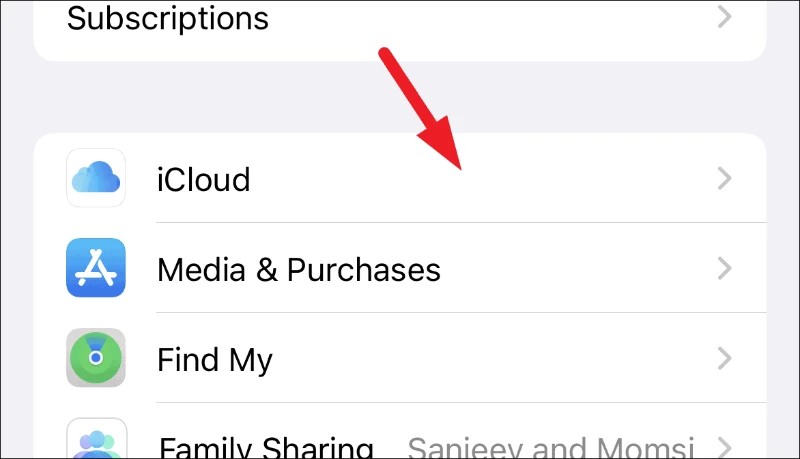
Step 3: Now, scroll down and find the “iCloud” option and then tap on it.

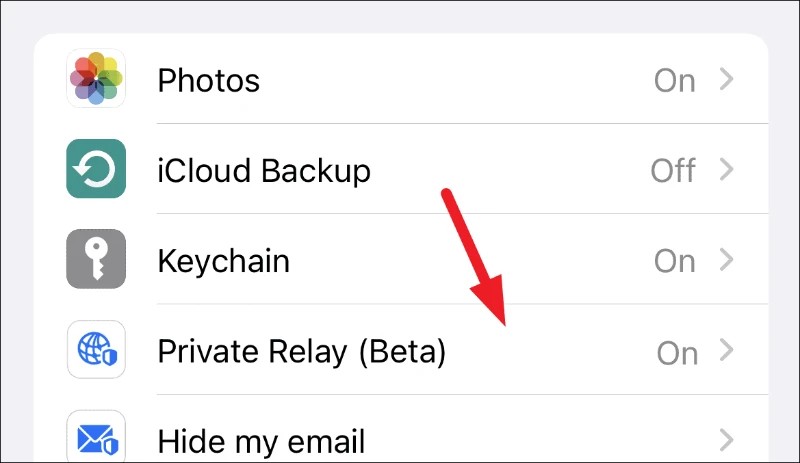
Step 4: Under the “Storage” section, you will see a tab for “Private Relay.” Tap on it to continue.

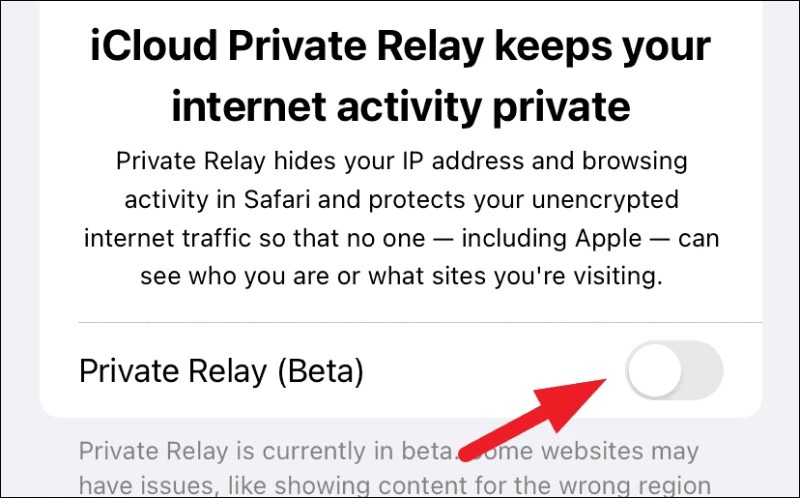
Step 5: Here, you can toggle the switch ON to enable the feature or toggle it OFF to disable it.

That’s it. You can easily change the status of the Private Relay on your Apple iPhone smartphone from this settings page.
