If you are a Windows 10 user you might be aware of those annoying pop-ups that you keep getting when you try to run something which is downloaded from the Internet. These pop-ups usually ask you for the confirmation of programs that you want to run because it may contain some viruses that can harm your computer.
However, if you have installed an Antivirus on your PC you don’t really need UAC because, in most cases, your Antivirus usually deletes the malicious files. In addition to this, not everything you download from the Internet contains a virus and these pop-ups can become annoying after a time. Hence, in this guide, we are going to show you how you can disable UAC and get rid of these annoying pop-ups from your PC. Without waiting further, let’s get started.

How to Disable User Account Control on Windows 10
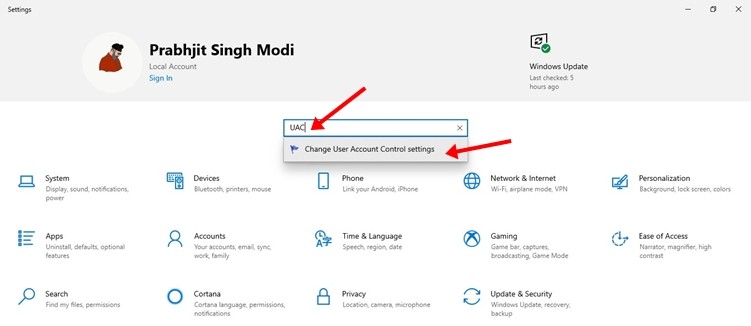
Step 1: Open Settings on your Windows 10 PC and search for “UAC” in the search bar.
Step 2: Tap on “Change User Account Control settings” to bring up the UAC settings.

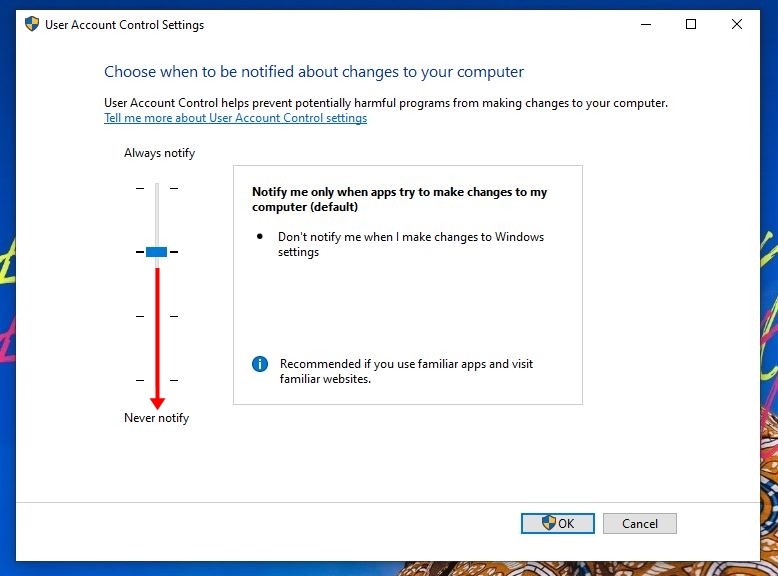
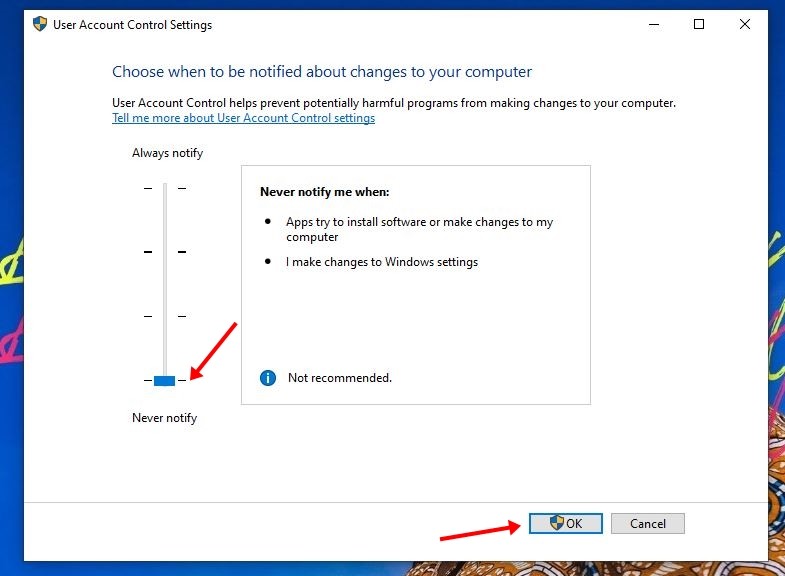
Step 3: By default, the UAC slider is set to “Notify me only when apps try to make changes to my computer” drag the slider down Never Notify.

Step 4: Click on the “Ok” button to save your changes.

That’s all. Doing this will completely turn off UAC from your PC. If you are using an older version of Windows 10, the changes will get applied for you once you restart your PC. Before you go make sure you also check out How to disable Security settings from File Explorer in Windows 10. For more updates on the latest tech news, smartphones, and gadgets, follow us on our social media profiles.
