Similar to most other operating systems, Apple’s macOS also enables its users to manage file permission based on user and user groups. But many may not be aware of the feature or simply not been able to find it.
In this guide, we’ll show you how you can use the file permission settings in the macOS-powered computer to restrict access for certain user or user groups.

How to manage file permissions in macOS
In macOS, there are two ways to set permission — using the Finder app or through the terminal. As terminal is a bit complex to use for regular users because of the need to enter commands, we’ll be using the Finder app route for permission management.
Step 1: Open the Finder app on your system which will be present on the Dock.
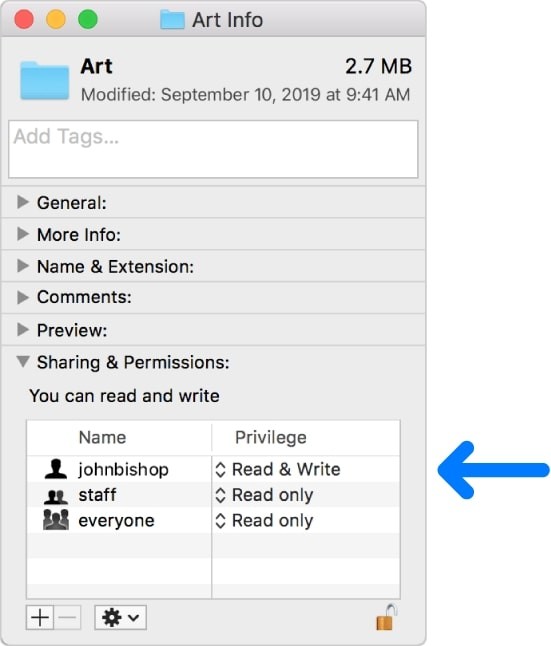
Step 2: In the app, right click a file or folder and select the “Get Info” option. Now, in the window that opens, select “Sharing & Permissions” option.
You’ll now be shown a list of accounts or user groups on your system along with the access levels under the “Privilege” category.

Step 3: To set permission for a user or user group that’s not listed, select the Plus (+) sign at the bottom of the window.
Step 4: Now choose the user or group in the selection window and then click the “Select” button.
You will be able to set permissions like “Read Only” access as well as the “Read & Write” access, which are pretty much self-explanatory.
Step 5: To edit the permission for existing user, click on the arrow next to the existing level for that account and then select either “Read Only” or “Read & Write” from the list. As the permissions are set instantly, close the window once you’re done.
