Windows operating system from Microsoft comes with some system requirements and the Windows 11 is no exception. The system needs to meet those requirements in order to work smoothly and in some cases, even to install the newer version of the operating system.
In the new Windows 11 OS, the company has now started adding a new watermark to the system if it doesn’t meet all the requirements. That message reads “System requirements not met. Go to Settings to learn more” and is placed at the bottom-right corner, just above the taskbar.
If you have managed to install the Windows 11 operating system even if the system isn’t meeting all the requirements and you think it is running smooth enough for you without any major issues, then you can keep using it. In this step-by-step guide, we will show you how to get rid of the “system requirements not met” watermark from the Windows 11 computer.
How to remove the “System requirements not met” watermark in Windows 11
Step 1: Open the Run dialog on your computer by pressing Windows + R keys on the keyboard.
Step 2: In the Run dialog, type “regedit” and then click on the “Ok” button to open the Registry Editor.
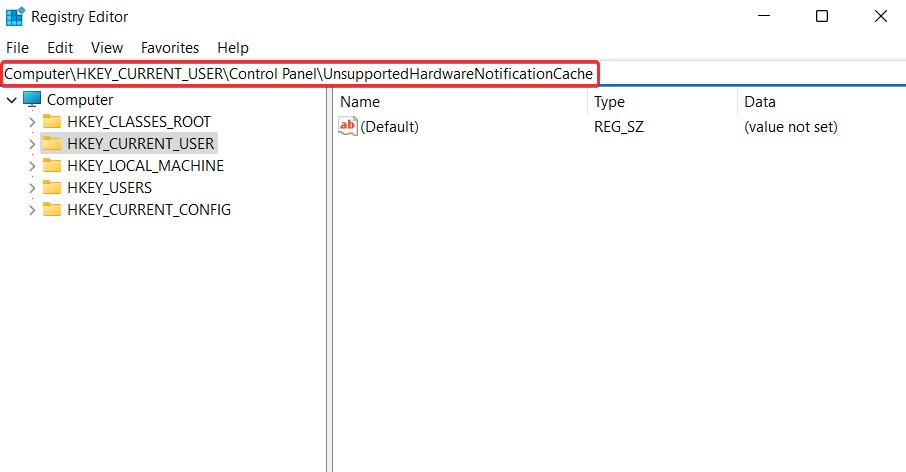
Step 3: In the Registry Editor, enter the following path in the address bar and then hit the Enter key:
Computer\HKEY_CURRENT_USER\Control Panel\UnsupportedHardwareNotificationCache

If you don’t see a key named “UnsupportedHardwareNotificationCache,” then you will need to manually create it.
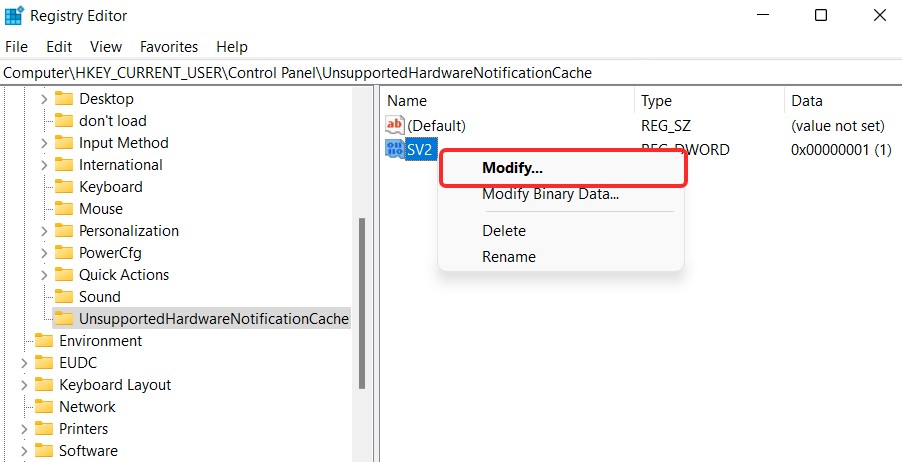
Step 4: In the ‘UnsupportedHardwareNotificationCache’ key, right-click on the SV2 DWORD value and click on the “Modify” option.

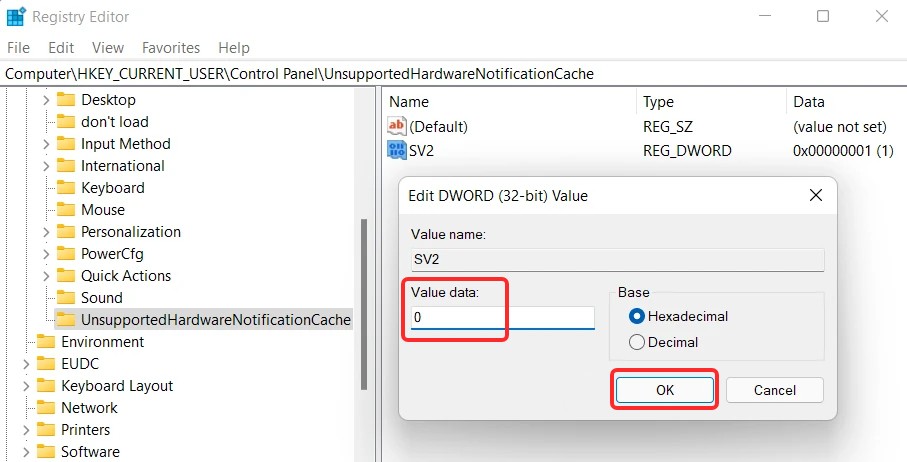
Step 5: In the pop-up window that opens, change the “Value data” field from “1” to “0” and click the “Ok” button.

That’s it. You can now close the Registry Editor and restart your Windows 11 computer to apply the change made in the SV DWORD. Once you have followed all the steps mentioned in this guide and then restarted your computer, you will notice that the “System requirements not met” watermark has been removed from the Windows 11 operating system.

