The Windows 11 operating system from Microsoft comes with several new features and functionality, but the software also comes with some major changes in terms of user interface and user experience. The company is trying to phase out the Control Panel and is trying to add those configuration settings to the Settings application.
While it is a good thing to have all the settings available in a single place, the slow process of phasing out the Control Panel for the Settings app has created a lot of issues for the users as it has become difficult to access some rarely used settings and one such option is related to the audio.
The users of the Windows 11 operating system have support for changing the default audio device on their system from the Settings application, but it may not be as straightforward for everyone.
In this step-by-step guide, we will show you how to set an audio device as the default one on your Windows 11 operating system using the Settings application.
How to set a default audio device in Windows 11
Step 1: Open the Settings application on your Windows 11 computer. To do this, press the Windows + I keys on your keyboard, and the Settings app will open.
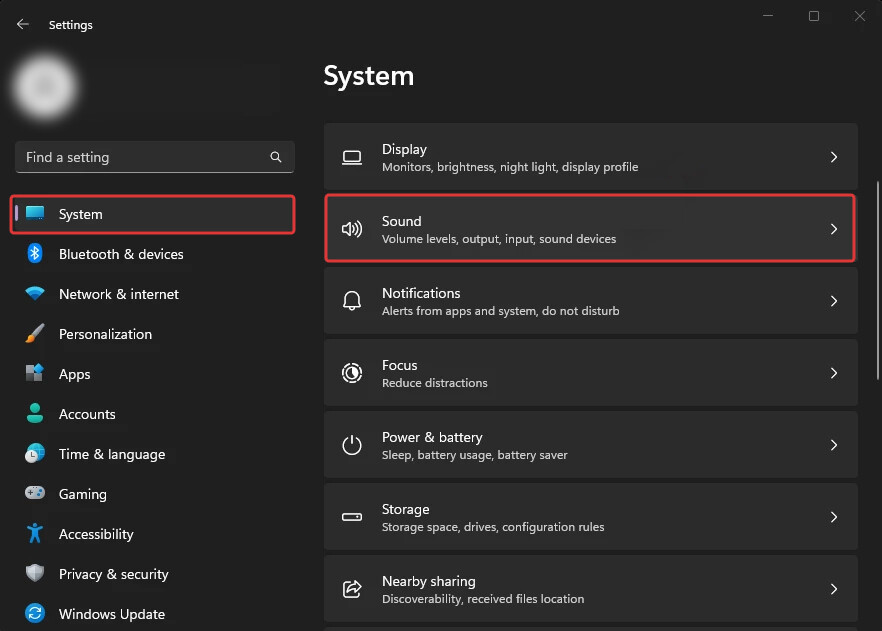
Step 2: When the application opens, select the “System” option from the left sidebar.
Step 3: Then select the “Sound” option on the right side pane and select the desired input device.

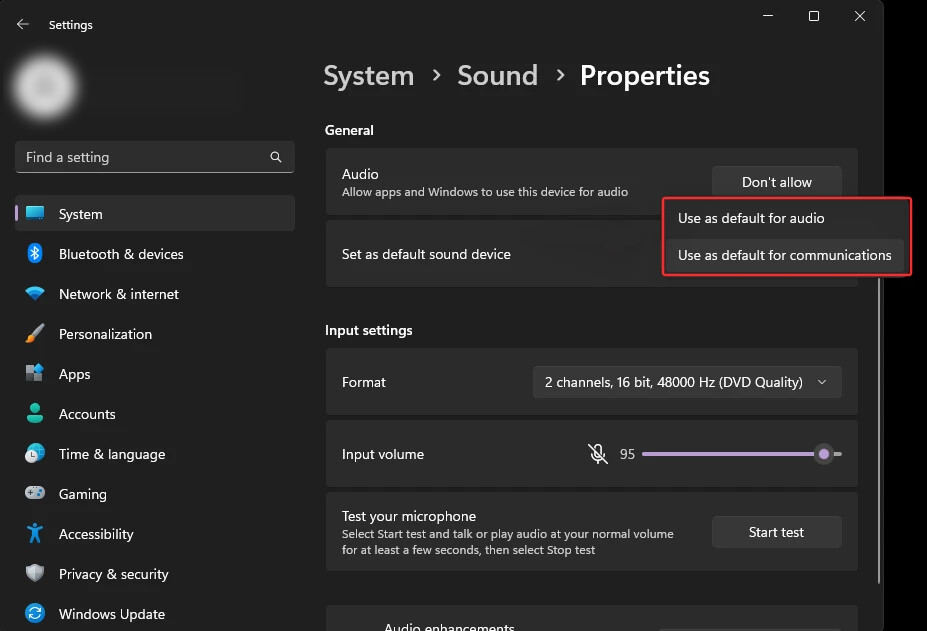
Step 4: After that, click on the drop-down menu next to the “Set as default sound device” option.
Step 5: Select if you want to use it as default for audio or default for communication.

That’s it. Once you have followed the above-mentioned steps, then you have successfully selected a new audio device as the default one on your Windows 11 computer. If you want the device to set as default for both the types — audio and communication, then follow the steps again and select the other option, and you will have set the audio device as default for both audio as well as communication on your computer.

