The Windows 11 operating system comes with support for multiple user profiles and the company has been working on making the process of switching between users easier. In line with that, Microsoft has added a feature called Fast User Switching to make the account or user switching process easier and faster.
With the help of Fast User Switching, the user can switch to another account on the Windows 11 computer without the need of logging out from the currently active account. Even after switching, it keeps all the process of the user account running in the background. This means that the user’s open programs, documents, files and folders, everything remains open even after switching to another account. While the feature is helpful, it also consumes a lot of system resources.
Even though the feature is helpful, especially for those who frequent switch between different users on the computer, it isn’t for everyone. If you are among those users who don’t use this feature or don’t need it on your system, then there’s a way to disable it.
In this step-by-step guide, we will show you how to quickly and easily disable the Fast User Switching feature on your Windows 11 computer using the built-in Group Policy Editor tool.
How to disable Fast User Switching in Windows 11
Step 1: Open the Local Group Policy Editor on your Windows 11 computer. To do this, open the Start Menu and search for “Edit Group Policy” and then select the tool from the search results.
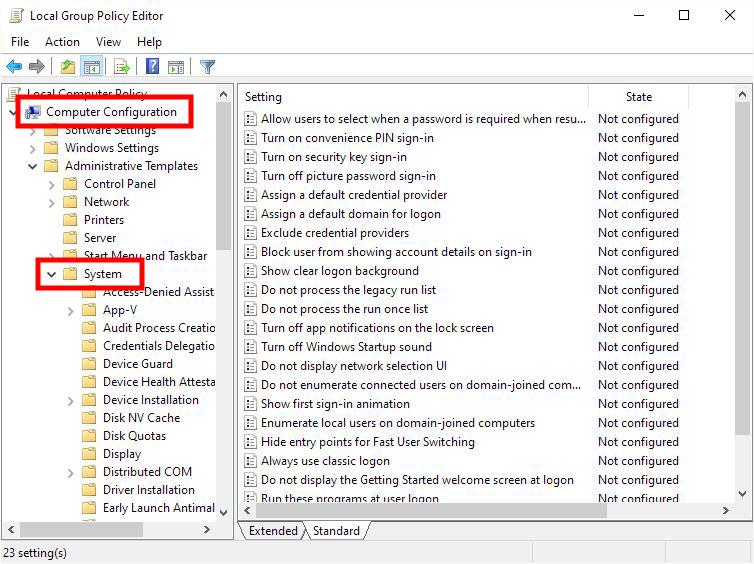
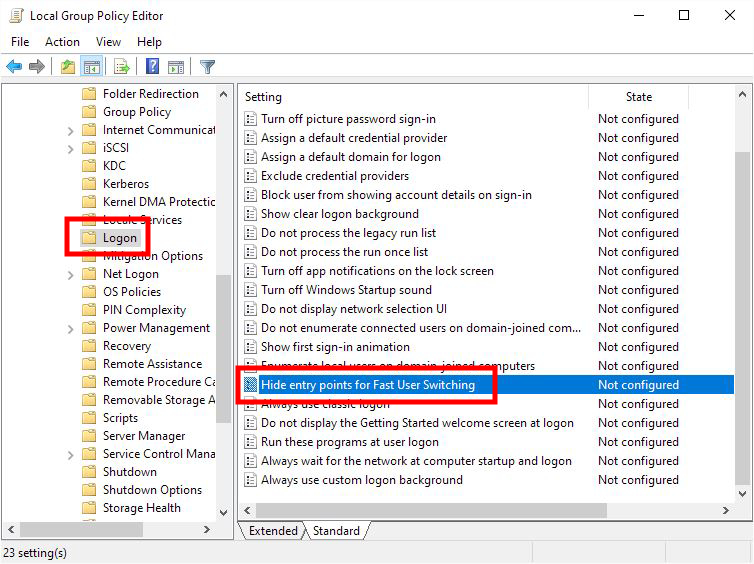
Step 2: When the Group Policy Editor opens, navigate to Computer Configuration > Administrative Templates > System > Logon folder.

Step 3: In there, open the “Hide entry points for Fast User Switching” policy.

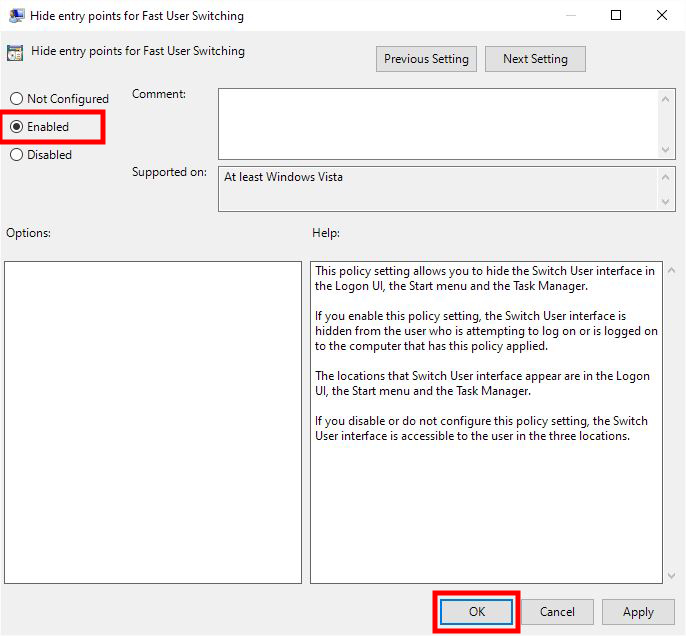
Step 4: On the window the opens, select the “Enabled” option and then click the “Ok” button.

That’s it. Once you have followed the above-mentioned step-by-step guide, restart your computer for the changes to take effect. After the device boots again, the Fast User Switching feature will be disabled on your Windows 11-powered computer. The options for Fast User Switching will able to removed the Start Menu, Task Manager, and the Lock Screen on your computer.

