The Windows 11 operating system from Microsoft comes with several features aimed at making the user experience better. One such feature is Clipboard history which keeps track of the recently copied or cut items from the system which can be used at a later time.
The clipboard feature generally holds only one item at a time but the holding capacity is increased with the Clipboard history feature. When the feature is enabled, instead of only having access to the most recent copied or cut item, the user gets access to 25 recent items. This means that the user can easily add multiple items to the clipboard and paste them elsewhere, saving the trouble of going back and forth between two programs.
In this step-by-step guide, we will show you how to enable the Clipboard History feature on Windows 10 or Windows 11 computers.

How to enable Clipboard History in Windows 11
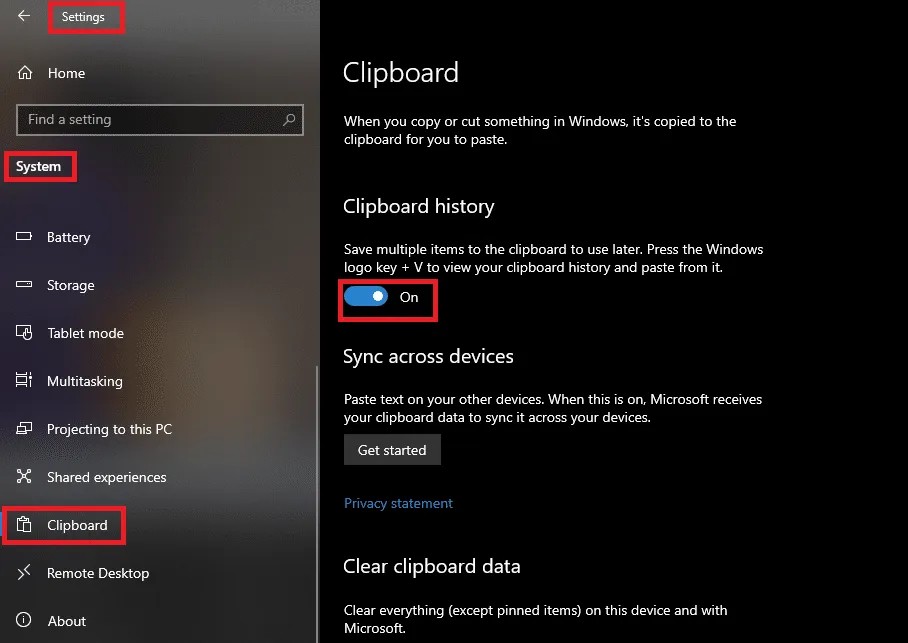
Step 1: Open the Settings application on your Windows computer. For this, open the Start menu and click on the Settings app (gear icon) or press the Windows + I keys on the keyboard.
Step 2: When the Settings app opens, click on the “System” option.
Step 3: After that, click on the “Clipboard” option from the left-side pane.
Step 4: In the Clipboard history section, toggle the switch ON to enable the feature.

That’s it. After you have completed all the steps mentioned above, the Clipboard history feature will be enabled on your Windows computer. You can view the history anytime by pressing the Windows + V keys on your keyboard. Do note that the Clipboard history keeps the last 25 copied or cut items on your system.

