If you are working outside of your country and all your friends and family are in a different country then it becomes important to know the time zones from both the countries. By default, Windows 10 only shows you time for a single time zone however it allows it’s users to add two additional clocks with different time zones.
While adding additional clocks is a pretty simple task, not everyone using Windows 10 is aware of how to do that. Hence, in this guide, we are going to show you how to add clocks from different time zones in Windows 10. Without waiting further, let’s get started.
How to add Clocks from different time zones in Windows 10:
Step 1: Open your Windows Settings from the Start Menu or search for it in the search bar.
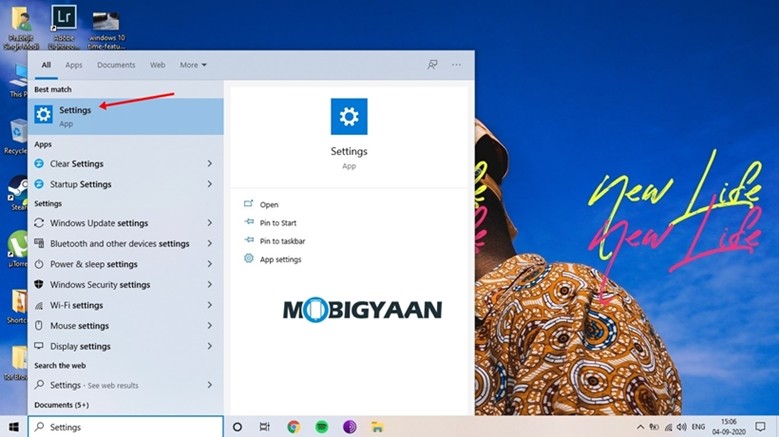
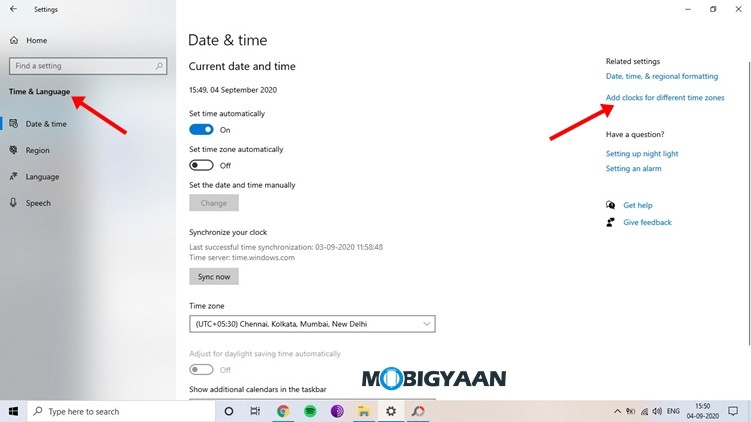
Step 2: Go to the “Time & Language” section from the Settings App and click on “Add clocks from different time zones” from the Related Settings menu to continue with the process.
Step 3: From the “Additional Clocks” section click on “Show this clock” to add a new clock to your taskbar. If you want more two additional time zones you can enable both the clocks from this section.
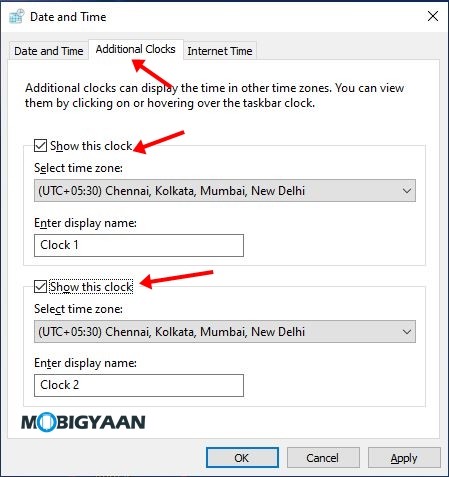
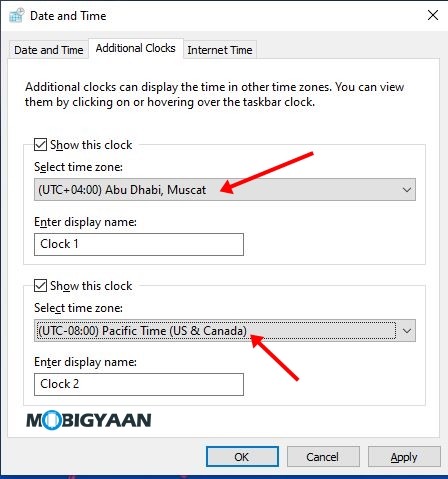
Step 4: From the drop-down menu, select the timezones for both the additional clocks you’ve added. As you can see in the image below we have added Abu Dhabi and Pacific Time Zone for our additional clocks but you can choose the one which goes the best for you.
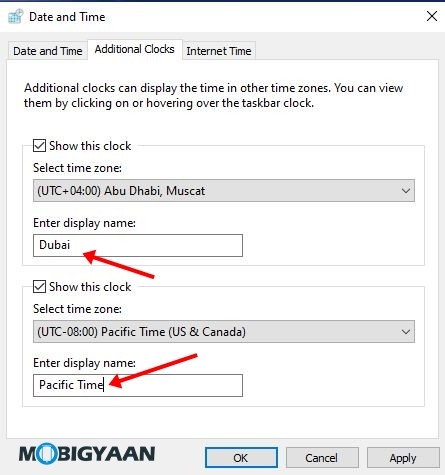
Step 5: Through this is optional, you can give your clock different names so you can avoid confusion between the time zones. In the “Enter display name” box type in the name you that you want to use for your Additional clocks. We’ll recommend you to use City or Country names so you can easily identify the time for that location.
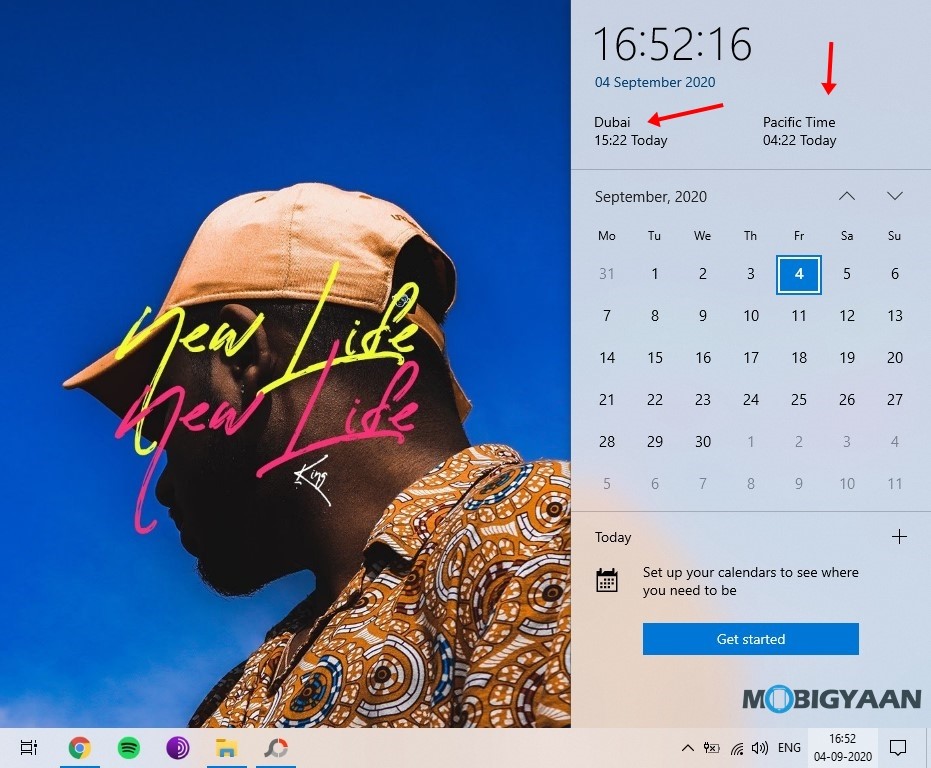
Step 6: Click “Apply” and then click on “Ok” to apply your changes. Click on your current time from your taskbar and you’ll see the additional clocks will be added,
That’s all, folks! More Windows 10 stuff can be found here – Windows 10 tutorials, guides, tips, tricks, and hidden features. To get updates on the latest tech news, smartphones, and gadgets, follow us on our social media profiles.
