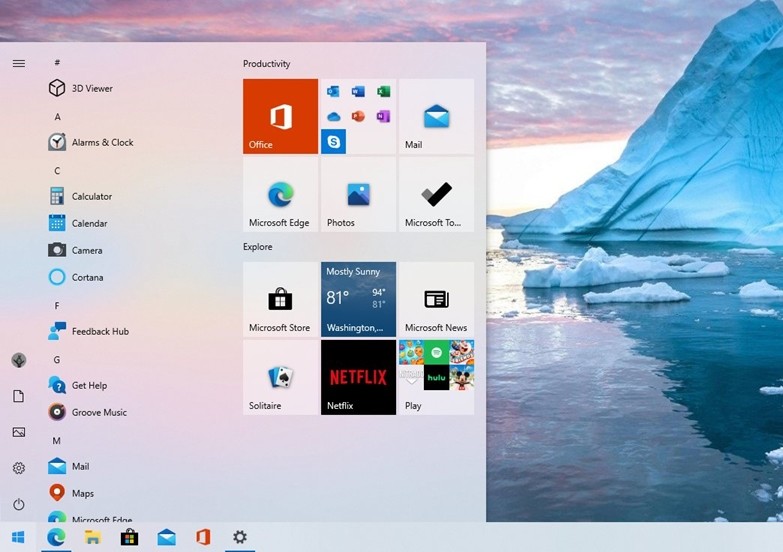
Microsoft’s next update to its popular operating system Windows 10 is expected to roll out later this year during Fall 2020. The Windows 10 20H2 update is expected to come with some new features which include a new start menu design, notification improvements, taskbar personalization and much more.
While there are a lot of users are waiting to get their hands on the new features from the next update, some of them can be unlocked right now by making some changes to the registry. For those who don’t know Microsoft has already integrated some of the Windows 20H2 features in Windows 10 version 2004 but unlocking them is a bit tricky.
It is to be noted that users have to install this week’s preview updates before making changes to the registry.
Here’s how to unlock the features of Windows 10 version 20H2
1. Open Registry Editor on your Windows 10 device by typing “regedit” in Run. You can bring up Run simply by pressing Windows Key + R else just access it directly from the Start Menu.
2. Make the following modifications to the Registry:
[HKEY_LOCAL_MACHINE\SYSTEM\CurrentControlSet\Control\FeatureManagement\Overrides\0\2093230218]
“EnabledState”=dword:00000002
“EnabledStateOptions”=dword:00000000
3. Once done simply restart your device and once it reboots 2 new features from the Windows 20H2 update including the newly designed start menu will be up and running on your system.

In addition to this, once you’ve made changes to the registry you’ll also get access to the new Microsoft Edge features which can be customized from the settings menu. Open tabs from Microsoft Edge will start appearing in Alt + TAB shortcut which will make the multitasking easier. You can further change these settings by going into Settings > System > Multitasking.
Also Read:
