Windows operating system has always been the best for multi-tasking as you can easily run multiple applications at once and quite easily and quickly switch between them. Instead of switching between the app, you can also keep multiple windows open to the screen to ease of access.
With the latest Windows 10 operating system, Microsoft has made the window snapping feature easy to use and also made it robust. Through the Snap Assist feature, there are several ways to split windows on your computer screen
In Windows 10, Microsoft tightened up the snapping mechanism and expanded its functionality. Today, the latest version of Windows 10 offers a number of ways to split your screen into multiple windows and get real work done, with better support for higher resolution displays and multiple monitors.
How to Split Screen in Windows 10 via Snap Assist
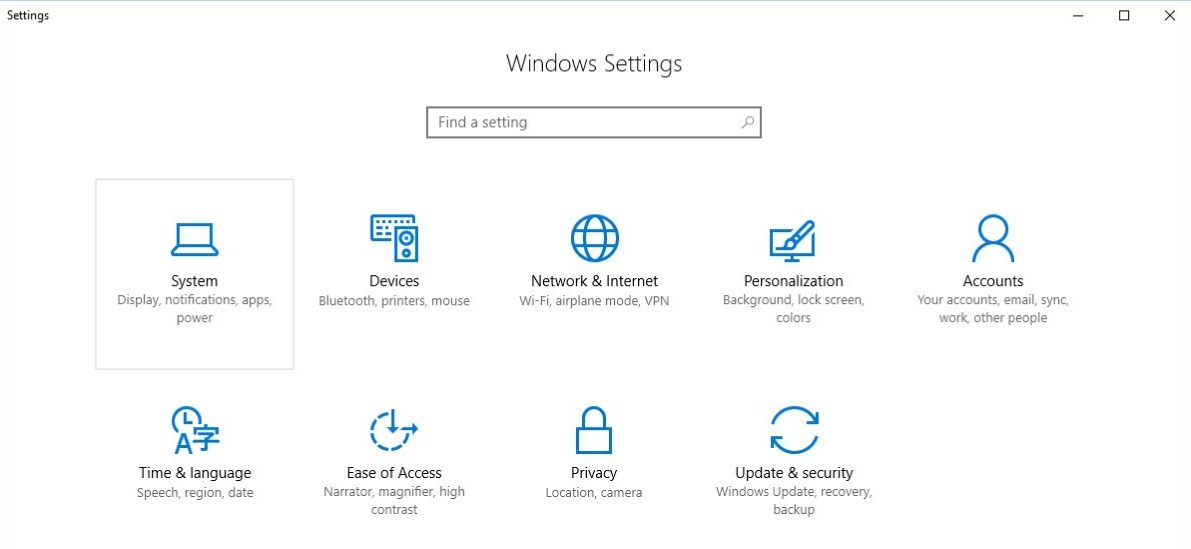
Step 1: First of all, you need to enable the Snap Windows feature on your computer. To do so, just open the Settings app on your system by searching for the term “Settings.”
Step 2: Now, from the options in the Settings app, click on System.

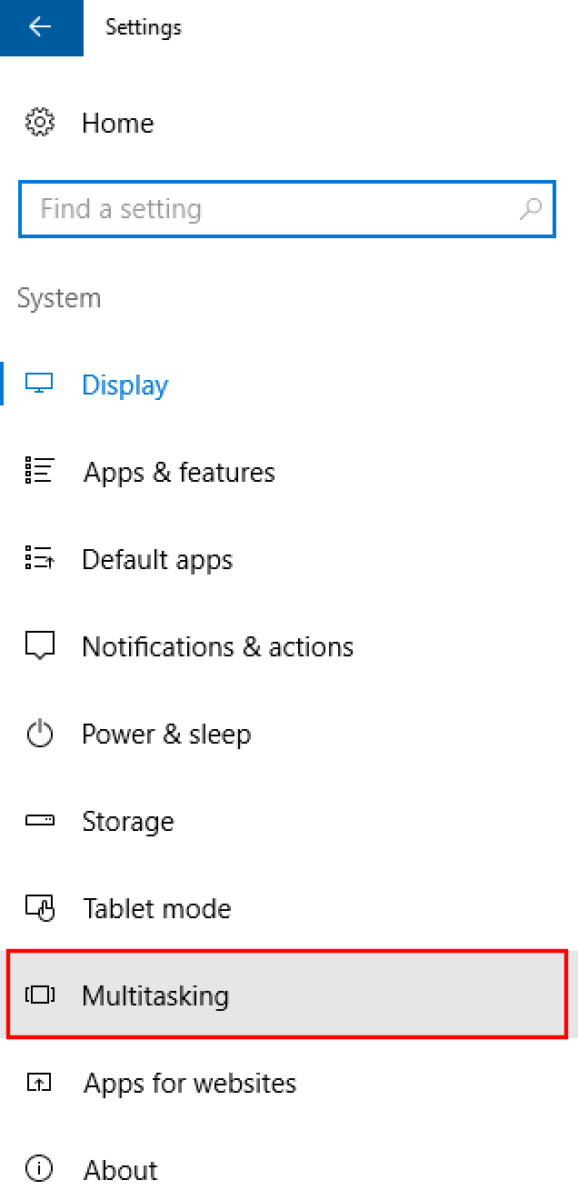
Step 3: Inside the System settings, go to the Multitasking section from the left-side menu.

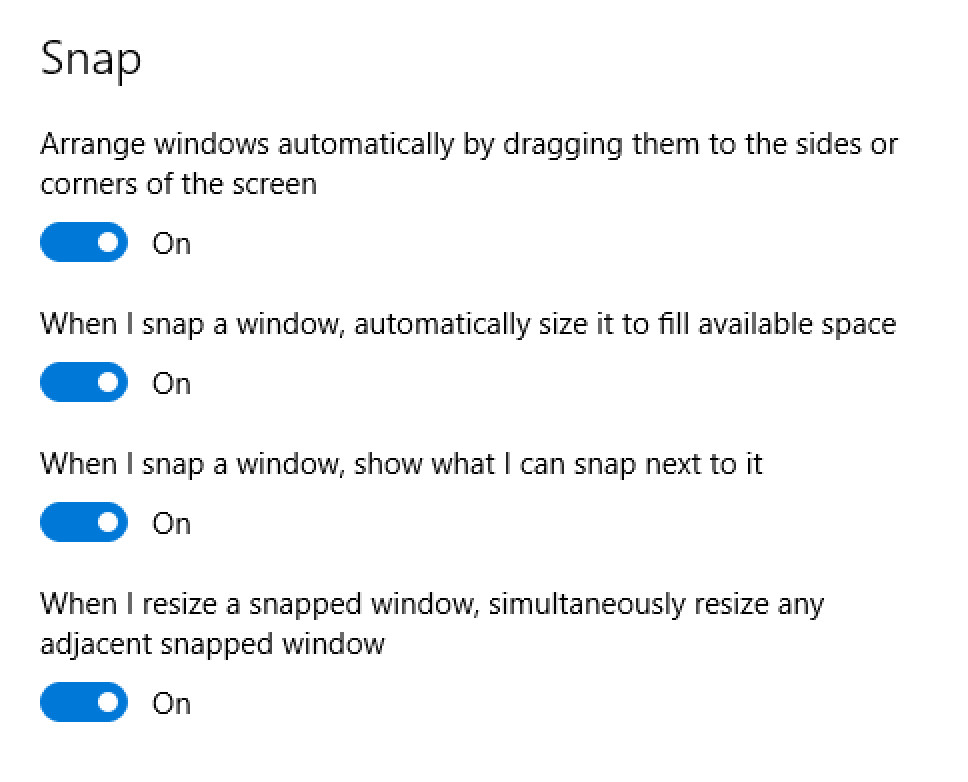
Step 4: Toggle ON the option that reads “Snap Windows”.
Once you enable the Snap Windows option, you will see three checkbox options. You can enable all three of them. The options are:
- When I snap a window, automatically size it to fill available space.
- When I snap a window, show what I can snap next to it.
- When I resize a snapped window, simultaneously resize any adjacent snapped window.

After the feature is enabled, you can just drag a window to one side of the screen and it will automatically fit that side. Dragging and dropping the window to the left side will fill the left side of the screen and dragging it to the right will fill the right side of the screen on your computer.
Similarly, if you drag the window to one of the four corners, the window will snap-fit to fill one quadrant of the screen. If you drag the same window to the top of the screen, it will make the window fill the entire screen.
Do check out our other Windows-related guide to make your experience even better by customizing the operating system as per your needs. We have also covered quite a few other guides related to macOS and Chromebook and more.
