Are you satisfied with your spreadsheet prints? If not, you have options to control how you print the Excel spreadsheets when you print Excel sheets. To better align an Excel sheet on a printed page, you can change margins, specify custom margins, or center the sheet either horizontally or vertically on the page. Here’s how you can adjust margins in Microsoft Excel.

What exactly are these page margins? Page margins are the blank spaces between your data and the edges of the printed page. The top and bottom page margins can be used for things such as headers, footers, and page numbers.
How To Adjust Page Margins In Microsoft Excel
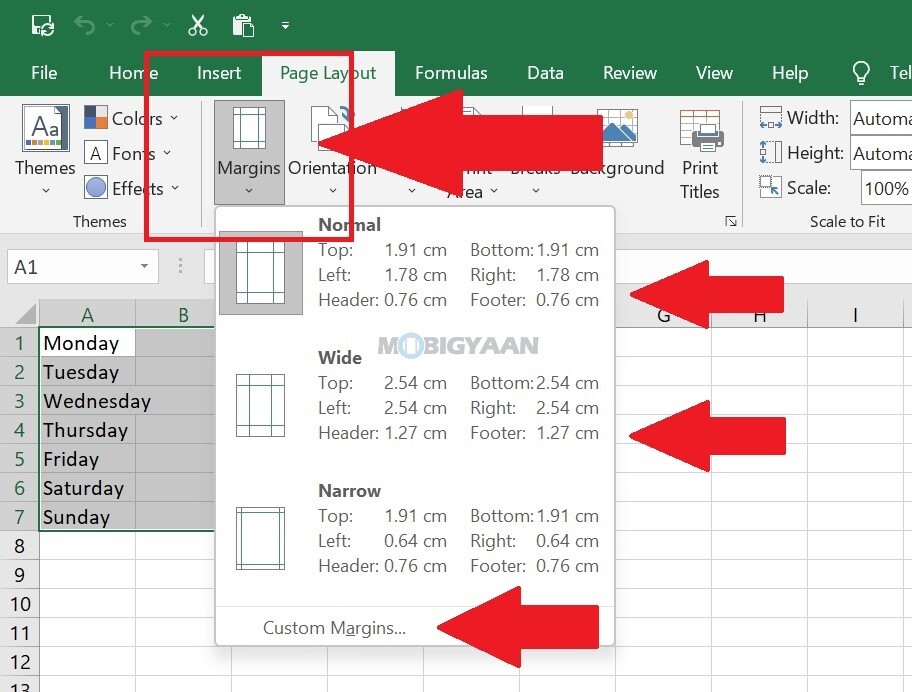
Changing the page margins help you to determine if you want the page borders to have more or less space after you print. You have a choice between three built-in margin settings – Normal, Wide, and Narrow.
By default, the sheet is set to Normal, but you can choose Wide or Narrow according to your requirement. Take a look at these steps to adjust built-in margins.
- Step 1: Launch Microsoft Excel and open the document you want to print.
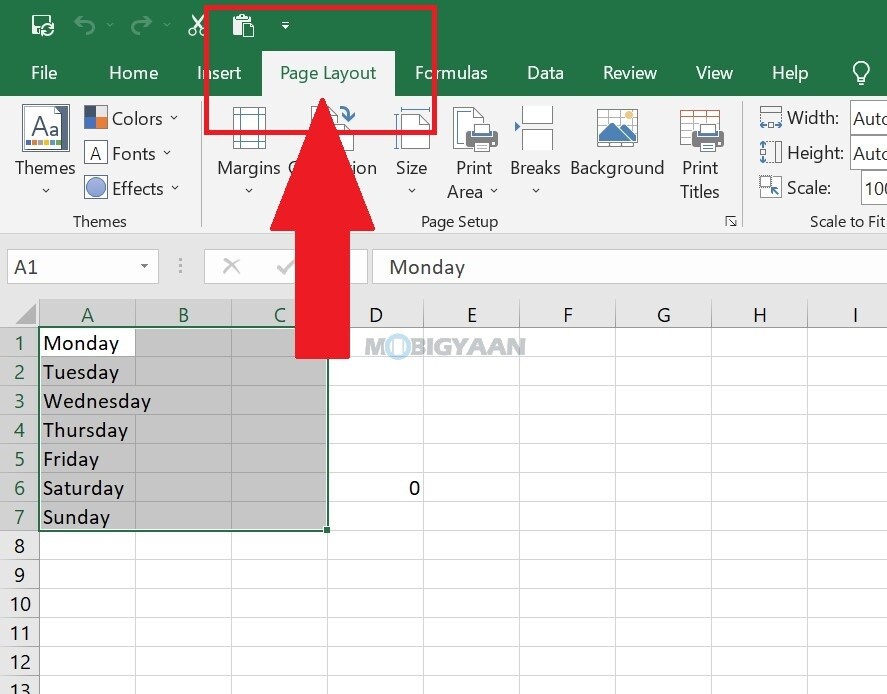
- Step 2: To adjust the margins, click on Page Layout in the menu bar, and under that, click on Margins.

- Step 3: Choose from the built-in options – Normal, Wide, or Narrow. You can see the preview on the left side while selecting the margins.

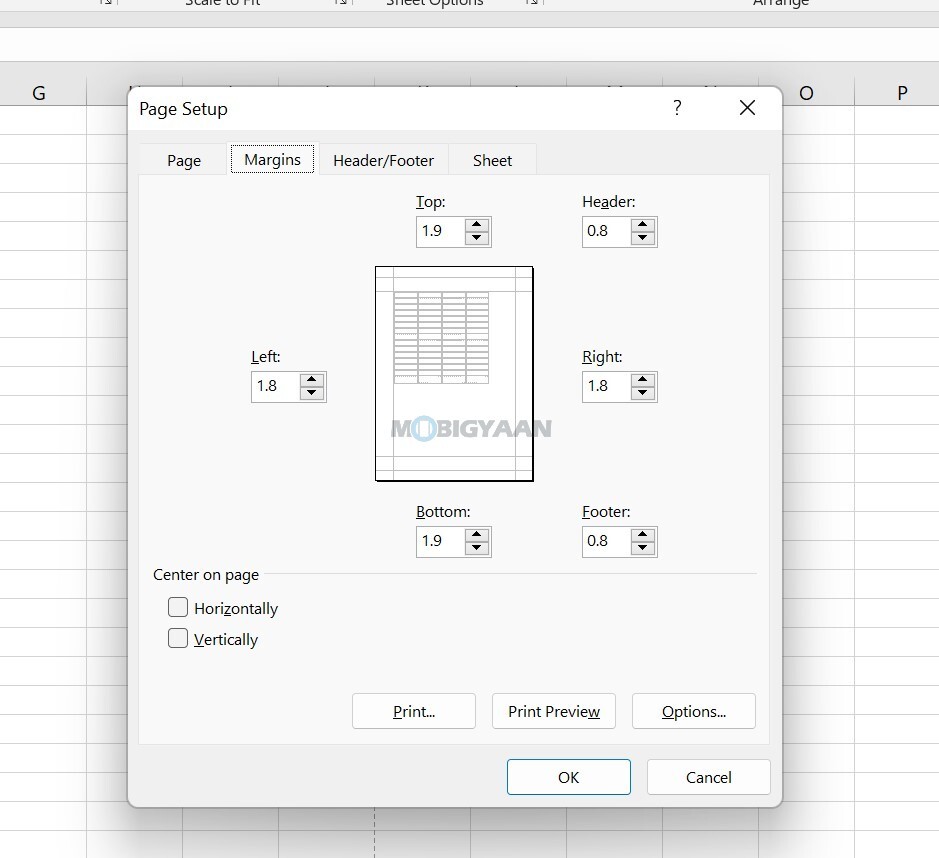
- Step 4: If you don’t want to use the built-in margins, you can also set your custom margin by clicking on Custom and setting the page margin as per your need. Here, you can manually change the Top, Bottom, Left, Right, Header, and Footer as well as center the page horizontally or vertically from the given options in this window.

You can add your logo, watermark, signature, page numbers, headers, footers, or anything you wish. It helps you make your Excel sheets more readable, more eye-grabbing, and easier to present. Here’s how you can add images and text in the header or footer.
That’s all you have to do to adjust page margins in Microsoft Excel. You can do much more in Excel, we have more of these tips and tricks, hacks, and workarounds that are useful for you, visit our How-To Guides section for more.
Here’s some good stuff for you to quickly jump in.
- How To Hide Formulas In Microsoft Excel
- How to add a drop-down list in Microsoft Excel
- How To Create Your Own Shortcuts In Microsoft Excel
- How To Hide Cell Data In Microsoft Excel
To get updates on the latest tech news, smartphones, and gadgets, make sure you follow us on our social media profiles.

